How do I get started with SDS library? – 8 easy steps
In this article, we will show you how to get started on using SDS Manager to manage your library of Safety Data Sheets (SDSs). We will cover the following areas:
Step 1: Create your locations (if you have chemicals stored and used on multiple locations)
Step 2: Import your existing SDS files (if you have any)
Step 3: Update the SDSs you imported to the latest version
Step 4: Add SDSs or Chemicals to your locations by searching our database of 13Million+ Safety Data Sheets.
Step 5: Create QR code poster to allow your employees to access the SDS library using QR code
Step 6: Invite your employees to join on SDS Manager
Step 7: Look through SDSs that contains restricted chemicals and substitute where necessary
Step 8: Create Secondary container labels for hazardous chemicals
Optional steps:
Step 9: Print out SDS binders if you prefer to have hard copies on the locations (Optional)
Step 10: Do Risk assessment for all your chemicals (Optional)
Step 11: Create risk-assessed Job procedures (Optional)
Step 1: Create your locations (if you have chemicals stored and used on multiple locations)
For organizations with large number of SDS, it can be helpful to organize the SDSs by locations/departments.
With a location structure, you can delegate administrator access for a subset of locations to other team members. It also allows you to let your employees only have access to SDSs relevant for the site in which they are working.
You can create a location structure with unlimited number of levels.
With SDS Manager, you can link your SDSs to locations.
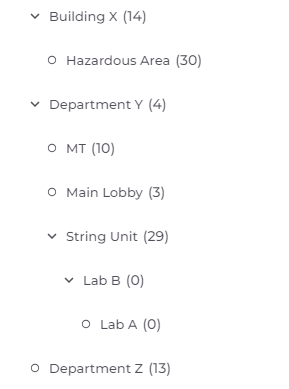
Below is an example of a location hierarchy. The number in the parentheses is the number of SDSs linked to each location.
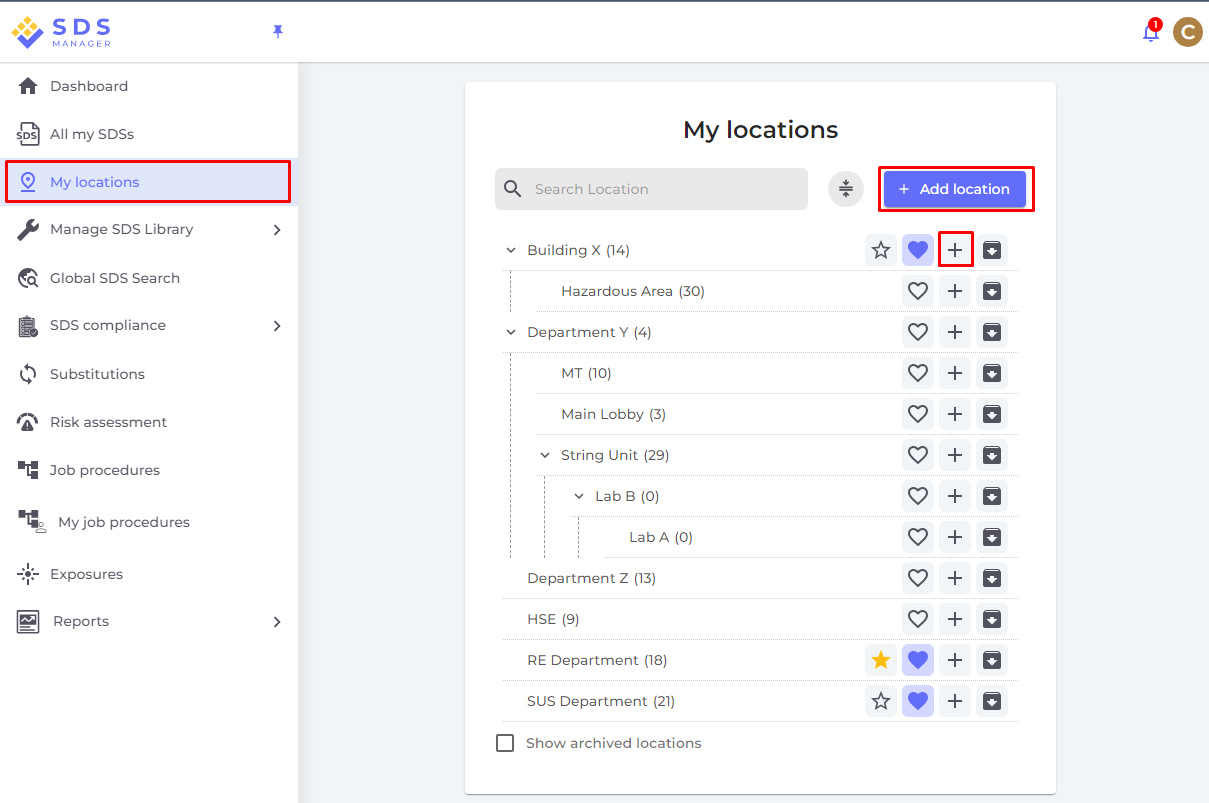
You can manage your location structure under the menu "My locations". Use the button "Add location" to create new locations and the "+" button to create child-locations.
Click here to open SDS Manager to manage your locations (require login)
Step 2: Import your existing SDS files (if you have any)
If you currently have your SDS files stored on a file-share, you can easily import all your SDSs to SDS Manager.
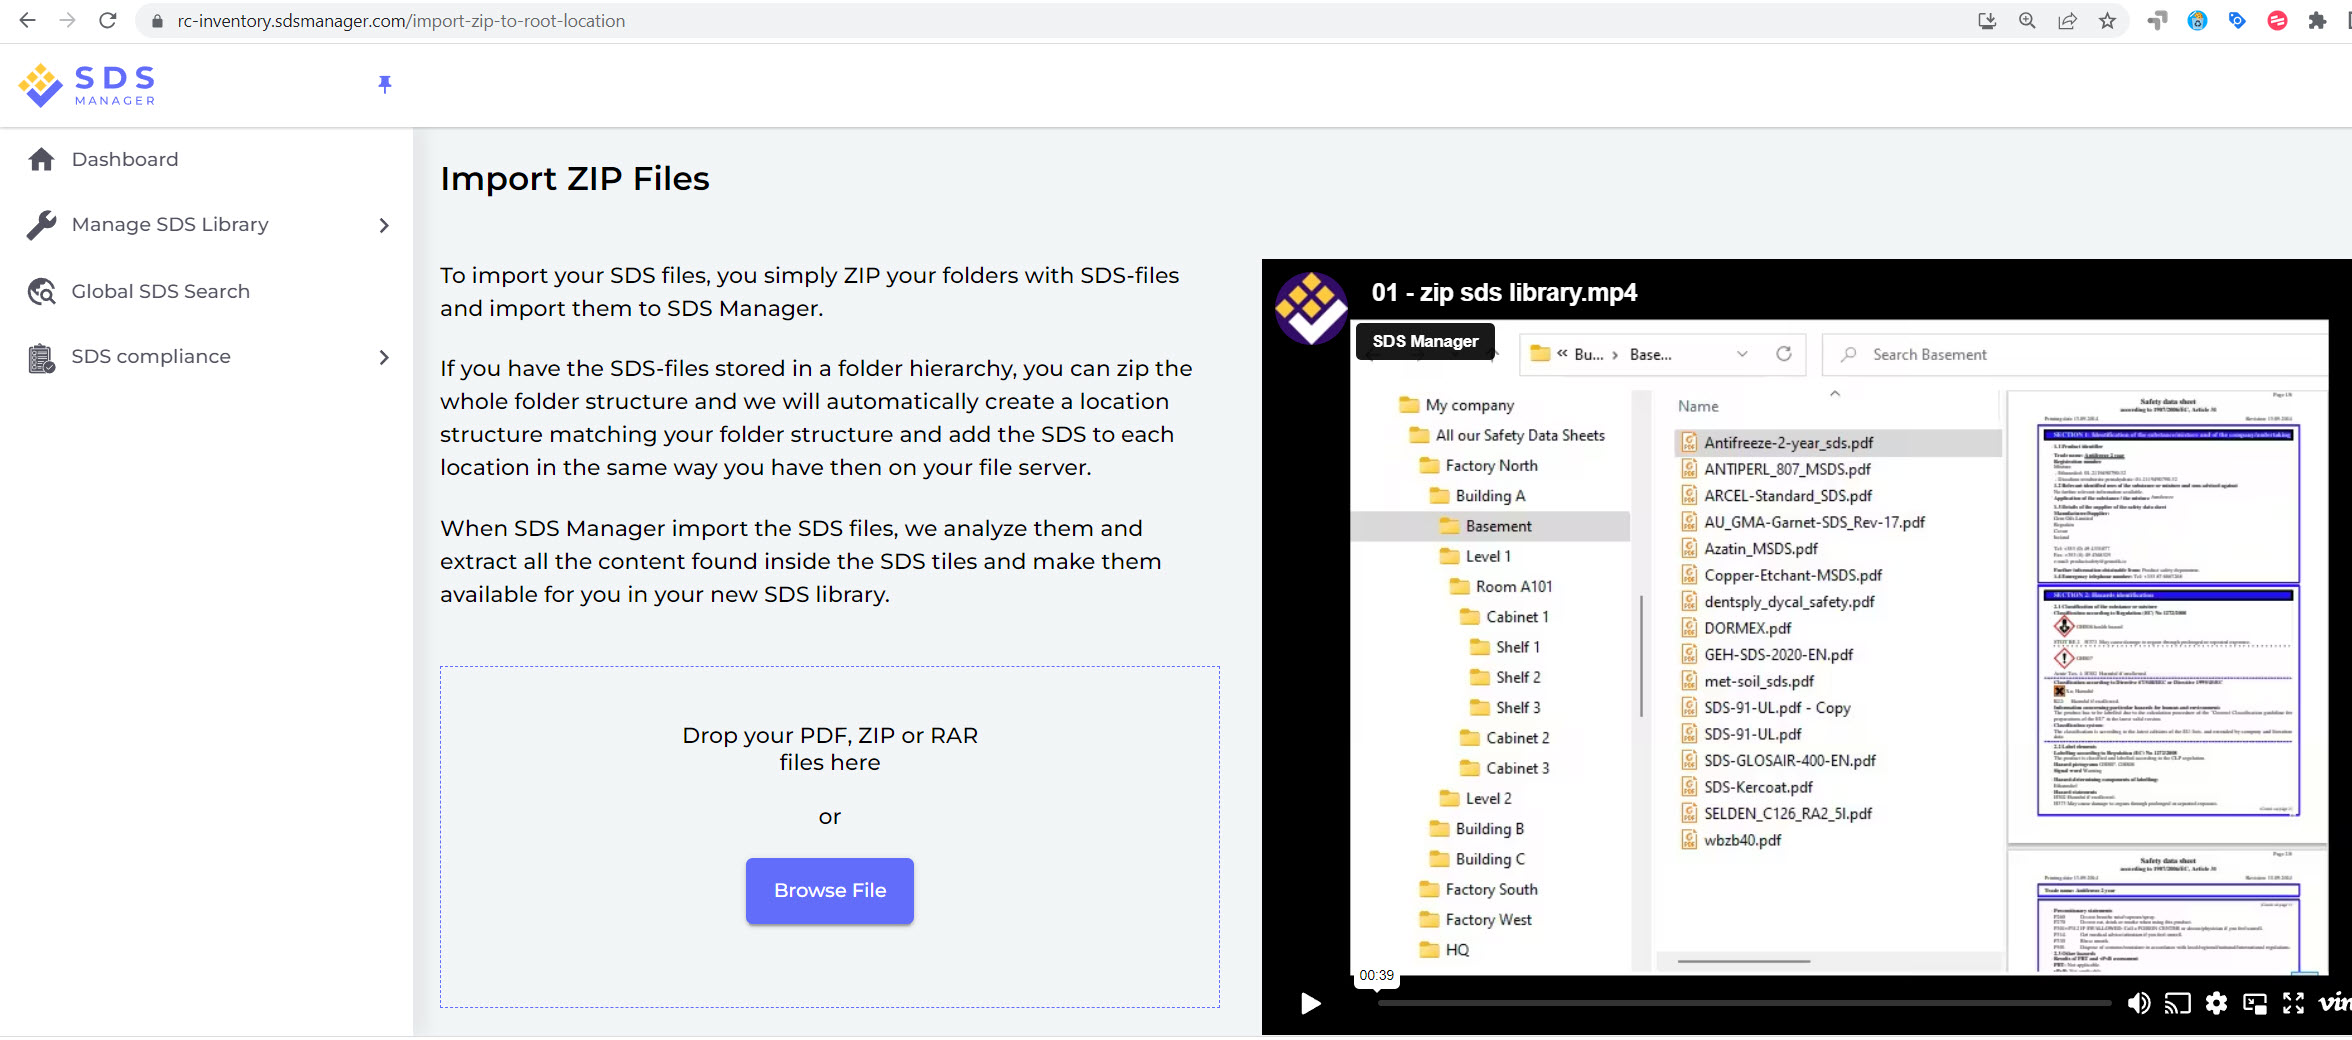
You can simply zip your folders with SDS-files and import them to SDS Manager.
If you have the SDS-files stored in a folder hierarchy, you can zip the whole folder structure and we will automatically create a matching location structure and add the SDSs to each location in the same way you have then on your file system.When SDS Manager imports the SDS files, we will analyze them and extract all the content found in the SDS tiles and make them available for you in your new SDS library.It is pure magic, and SDS Manager is the only company that have such an import feature.
Click here to open SDS Manager to import your zip file (require login)
When SDS Manager imports your ZIP file, the locations are automatically created and the SDsS are added to the corresponding locations:
After importing, you will be notified about all SDSs which are outdated and should be updated with the newer version we have in our database.
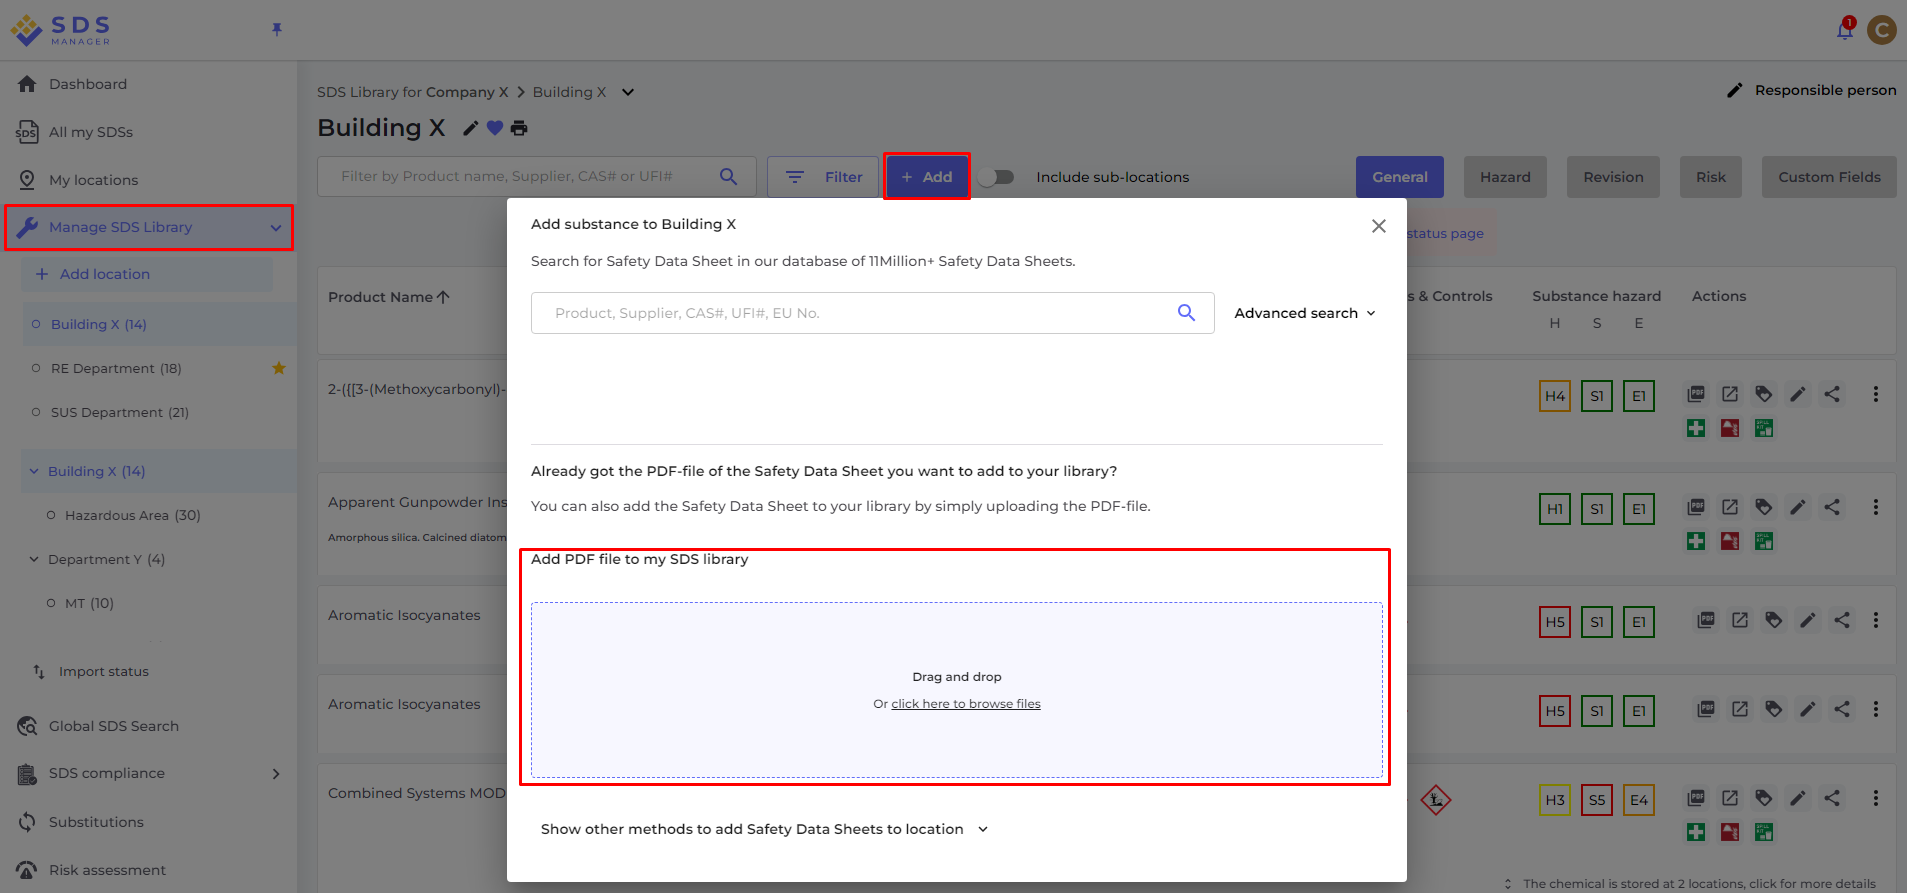
To upload a single SDS file, open the "Manage SDS Library" option and press the "ADD" button. In the dialog shown below you can drag and drop your file or browse in your system to add a SDS-PDF file to your SDS library
Click here to open SDS Manager to add a single SDS-PDF file (require login)
If you already have SDS-binders (PDF files that contain multiple SDS files) for each of your locations, you can simply upload the SDS-binder file to a location in your SDS library.
We will automatically read the PDF you import and detect which SDSs are in the file and add them to the location.
With this method, you can populate your SDS library with thousands of SDSs in a matter of minutes. The only requirement is that you have an SDS-binder for each location in your company.
If you do not have any SDS file but have XLS or CSV file with your substances instead, the list can be imported to SDS Manager. Let us know if you prefer to build your SDS library by importing your product inventory and we will help you import the data.
Step 3: Update the SDSs you imported to the latest version
New revisions of SDSs are issued every 1 to 3 years.
New revisions are issued because of new regulatory requirements, corrections or new discoveries by the suppliers. Users of chemicals are required to have the latest version of the SDS in their library.
SDS Manager are continuously crawling thousands of supplier websites for new revisions of safety data sheets and add them to our database.
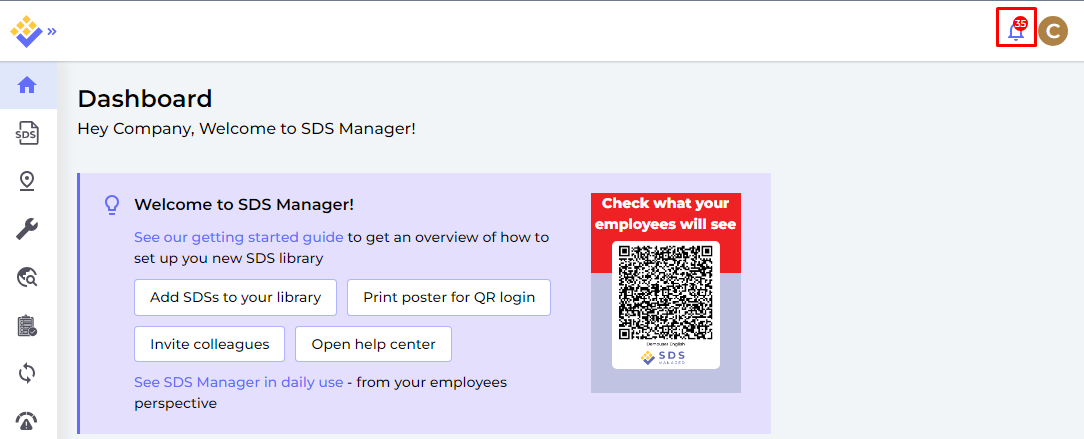
When you use SDS manager, you will be alerted when we find new versions of SDSs in your library. In the header bar of SDS Manager, you will see the alert icon showing the number of outdated SDSs you have in your library. In the example below, we have 35 outdated SDSs that need to be updated.
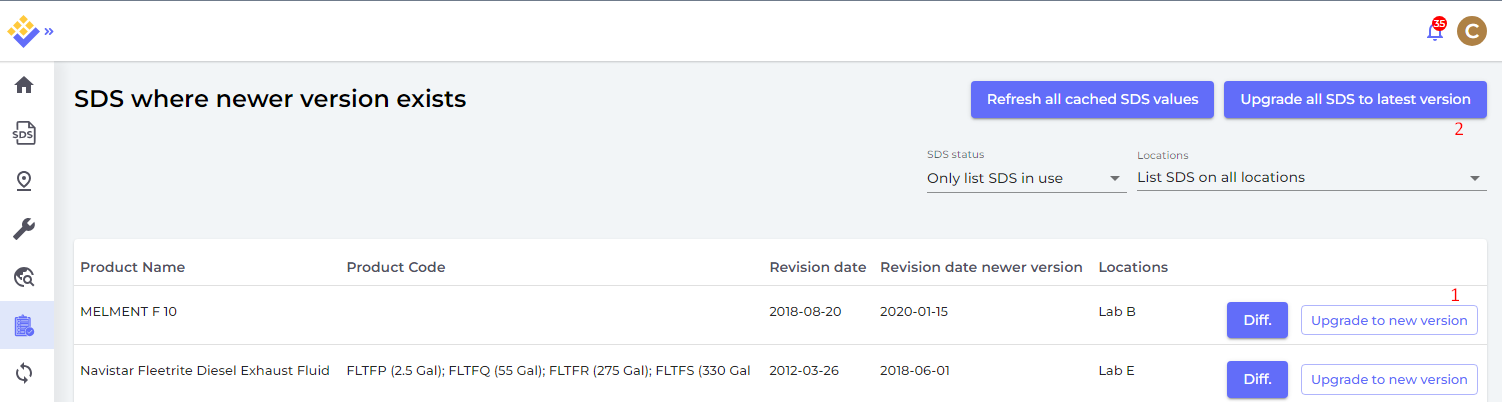
When you click on the notification bell, you will be directed to "SDS where newer version exists" page where we will list SDSs you have in your library for which we found newer versions.
Click here to open SDS Manager to review SDS where newer version exists (require login)

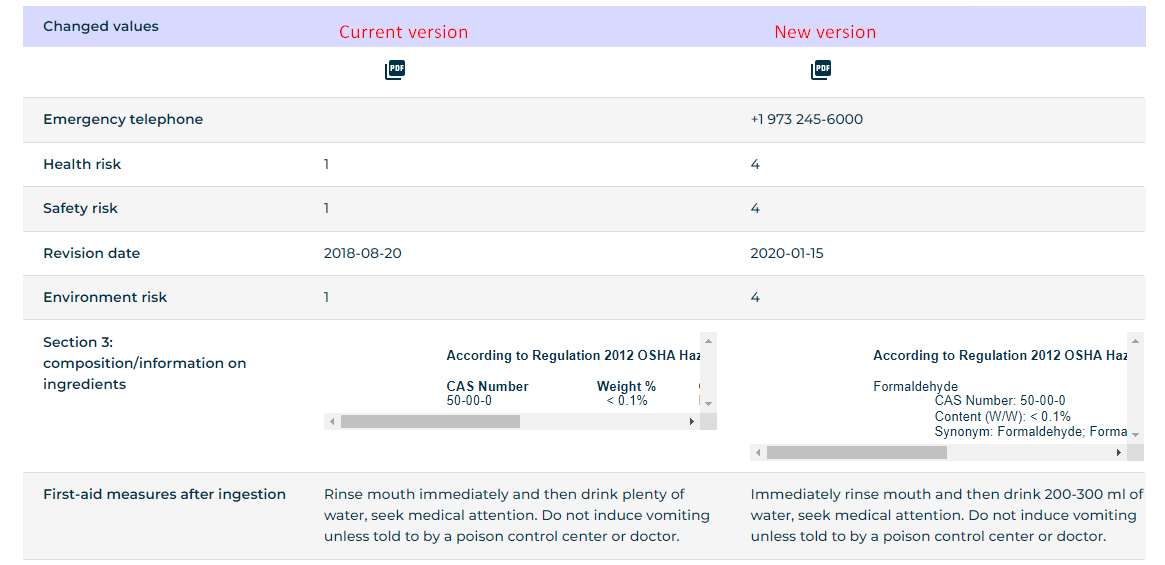
Click on the "Diff." button to see side-by-side changes between the SDS you are currently using and the new version.
You can choose to upgrade one SDS at a time (1) or upgrade all SDSs to the latest version in one operation (2).
Step 4: Add SDSs or Chemicals to your locations by searching our database of 13Million + Safety Data Sheets.
You can manage your SDSs under "Manage SDS Library"
Click here to open SDS Manager to manage your SDS library (require login)
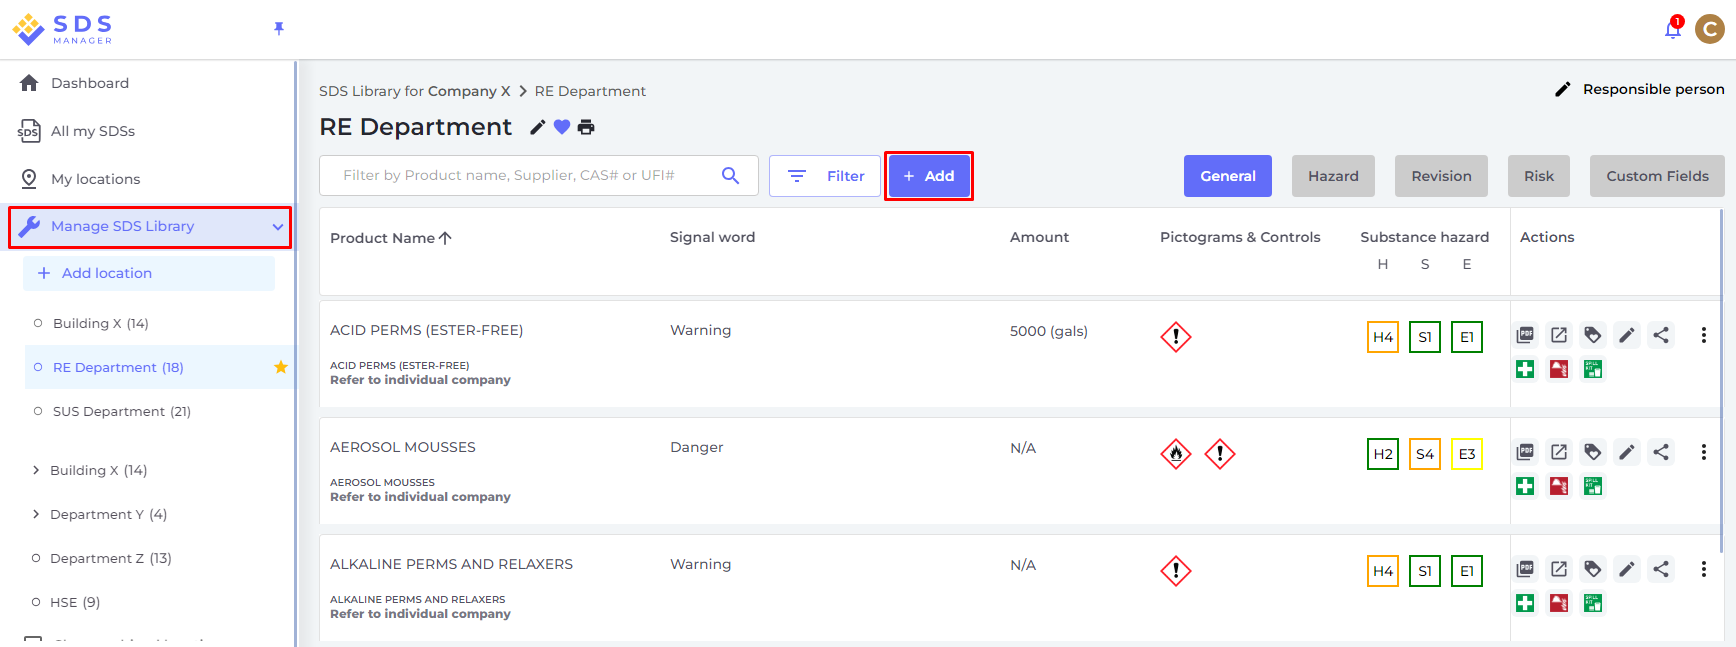
To add a SDS for a product, simply search for the product name, then hover on the (+) icon and choose "Add Safety Data Sheet to YOURLOCATION".
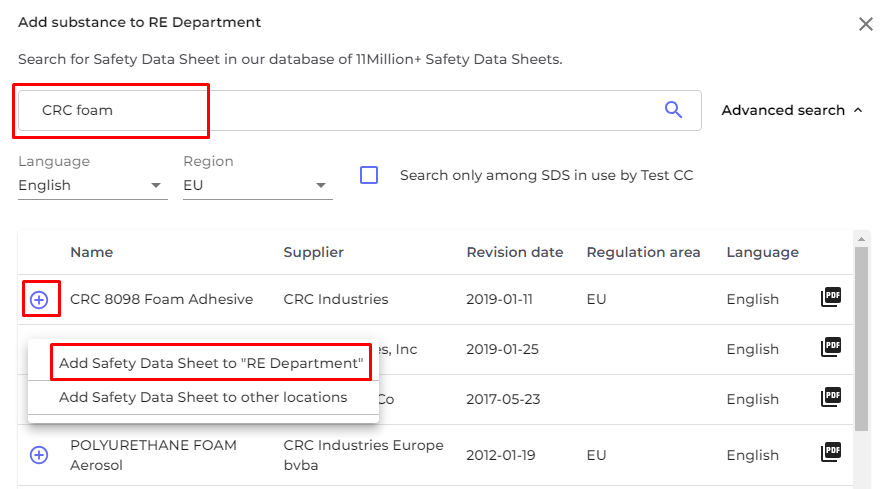
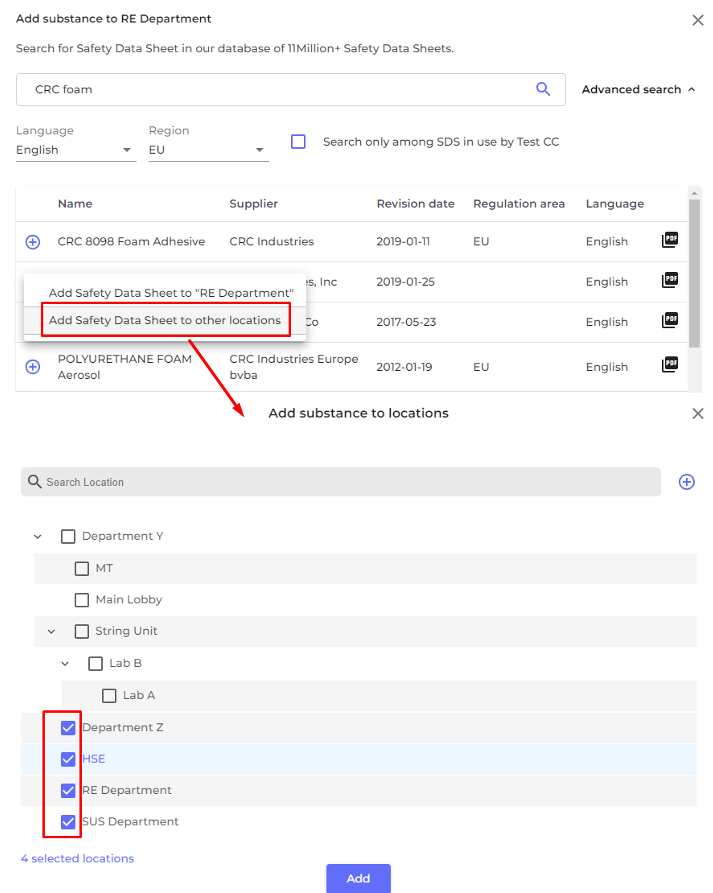
If you want to add the same SDS to multiple locations in one operation, select "Add Safety Data Sheet to other locations" instead.
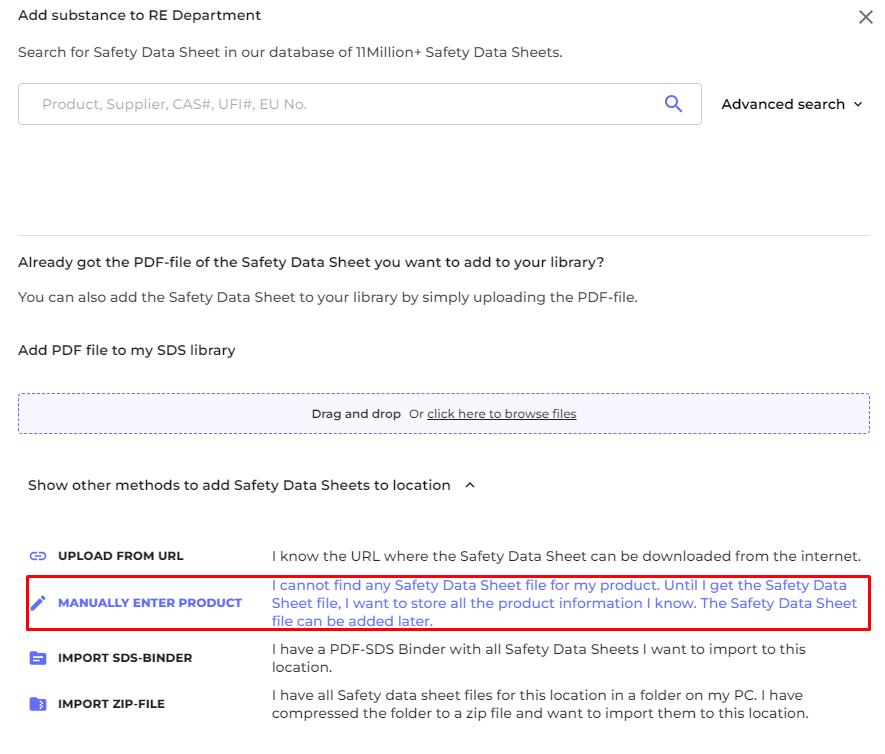
MANUAL ENTRY: Sometimes, you want to add a product to your SDS library but don’t know the SDS to link to the new product.
To handle such cases, you can add the product information to your SDS library and later link a SDS to the product. This way you can let your purchasing department or logistics personnel add products to SDS Manager and let the HSE-manager add the corresponding SDS later.
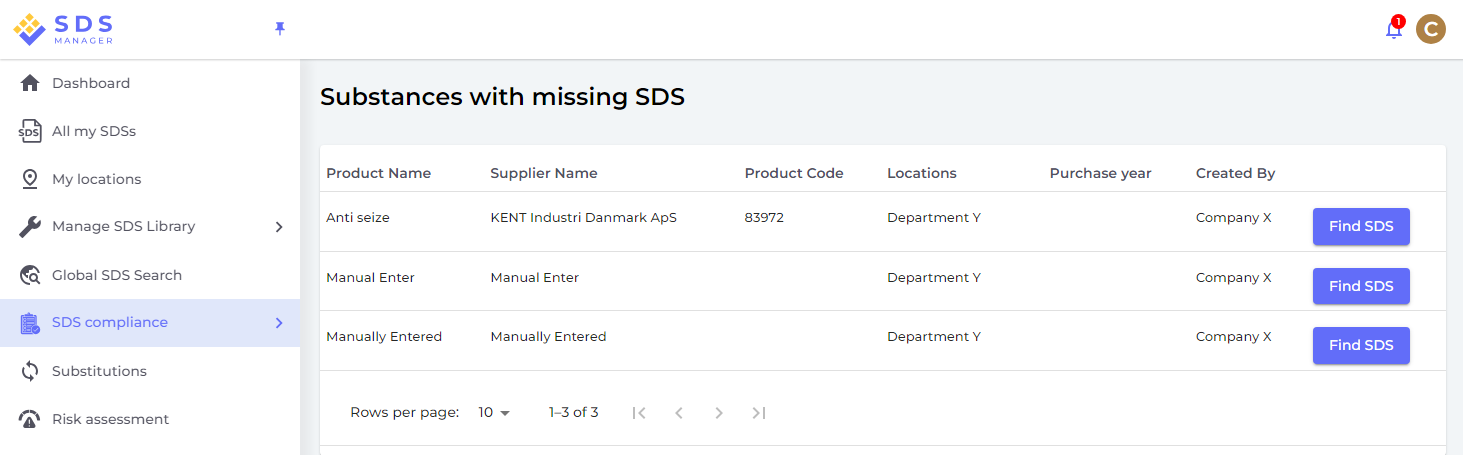
In SDS Manager, you will find a list of substances that are missing SDSs. With this list, it is easy to add missing SDSs to keep your library up to date at any time.
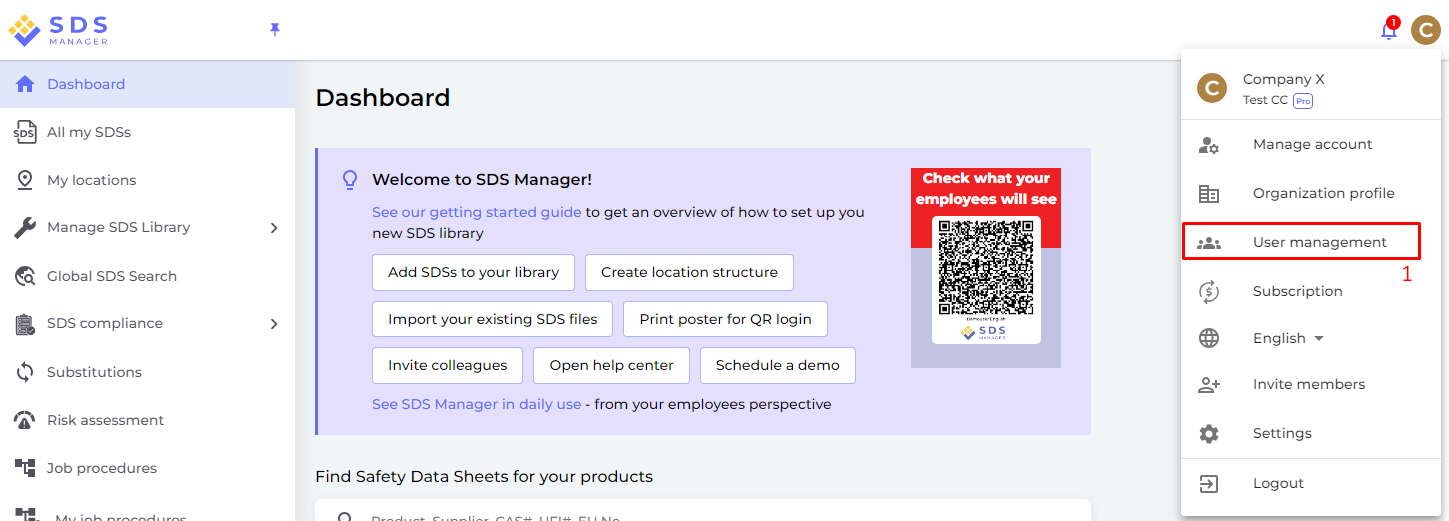
Step 5: Create QR code poster to allow your employees to access the SDS library
(1) Click here to open SDS Manager User management page (require login)

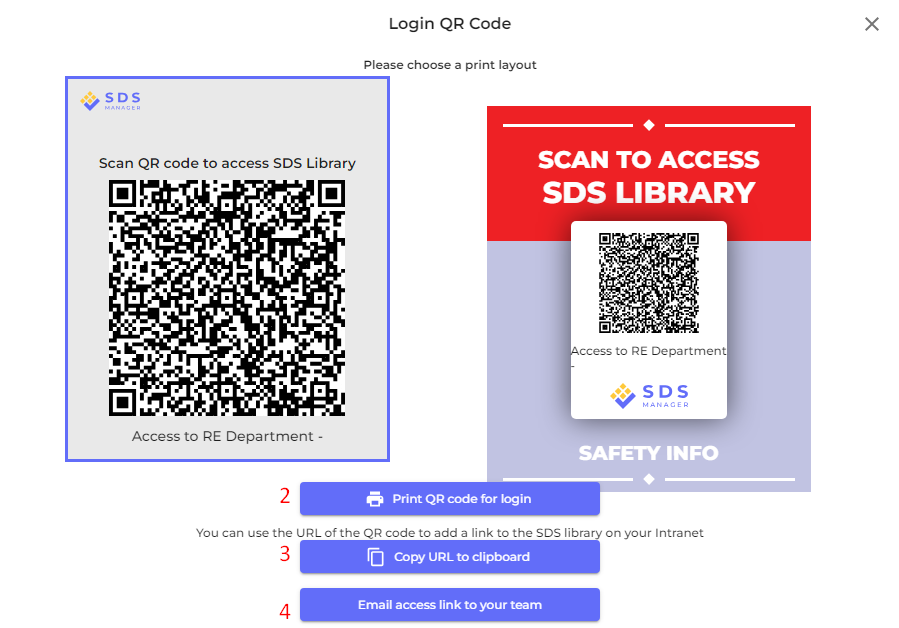
When the QR code user is created, you can view the QR code by (1) clicking on the QR code image.

The button (2) "Print QR code for login" will generate a poster with the QR code.
If you want to give access to your SDS library from your intranet, you can simply (3) create a QR code user, scan the QR code and copy the link and add it to your intranet.
The button (4) "Email access link to your team" allow you to share access via email.
You can or click on the image or scan the below QR code with your mobile phone to see how this will look for your employees.
If you want the link to give access to all SDS in your organization, the QR code user must be granted access to all locations.
You can create many “QR code users” – e.g., one for each of your locations, or a “QR code user” that gives access to all the SDSs your organization has in the SDS library.
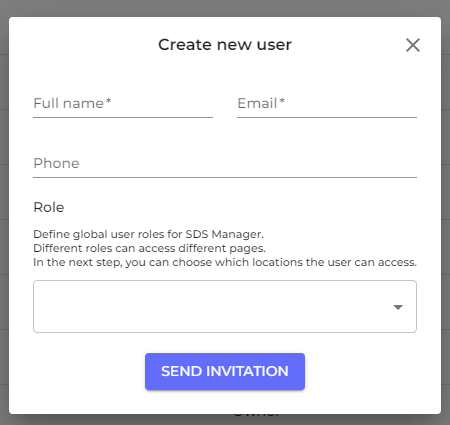
Step 6: Invite your employees to join on SDS Manager
With SDS Manager, you can add unlimited numbers of users. We suggest that you only create user accounts for employees that will administrate the SDS library.
Click here to open SDS Manager to invite employees (require login)

Invited users can have an Admin Role, Staff or No Access Role.
You are flexible to decide access type on location level. A user can be given an Admin role on one location and read-only access to other locations.
To be able to manage SDSs in your library, users wil need Admin role.
Step 7: Look through SDSs that contains restricted chemicals and substitute where necessary
SDS Manager has an overview of all chemicals listed on restriction lists like ZDHC, California Proposition 65, REACH and more.
The substances in these lists are identified with either EC or CAS number.
SDS Manager will extract the CAS and EC numbers from section 3 of the SDS you use and check if these numbers are found in any of the restriction list.
In SDS Manager, you will be able to list all the SDSs you have in your SDS Library that have restricted components.
Click here to open SDS Manager see what SDS in your library that are containing hazardous chemicals (require login)
Below is an example of how we list products with components on restricted list:
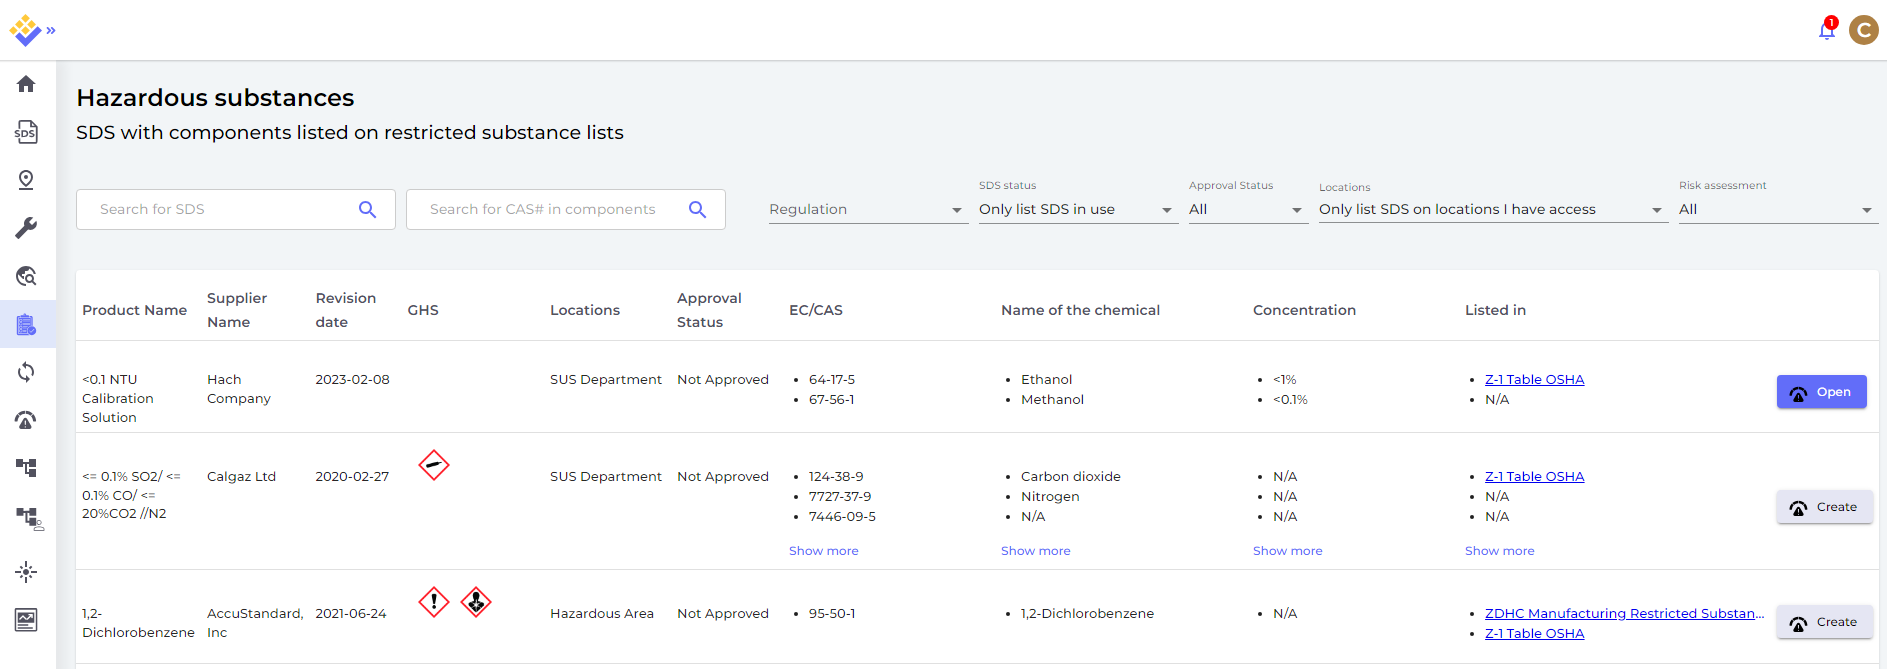
The above list is a prospective list of products that you need to assess.
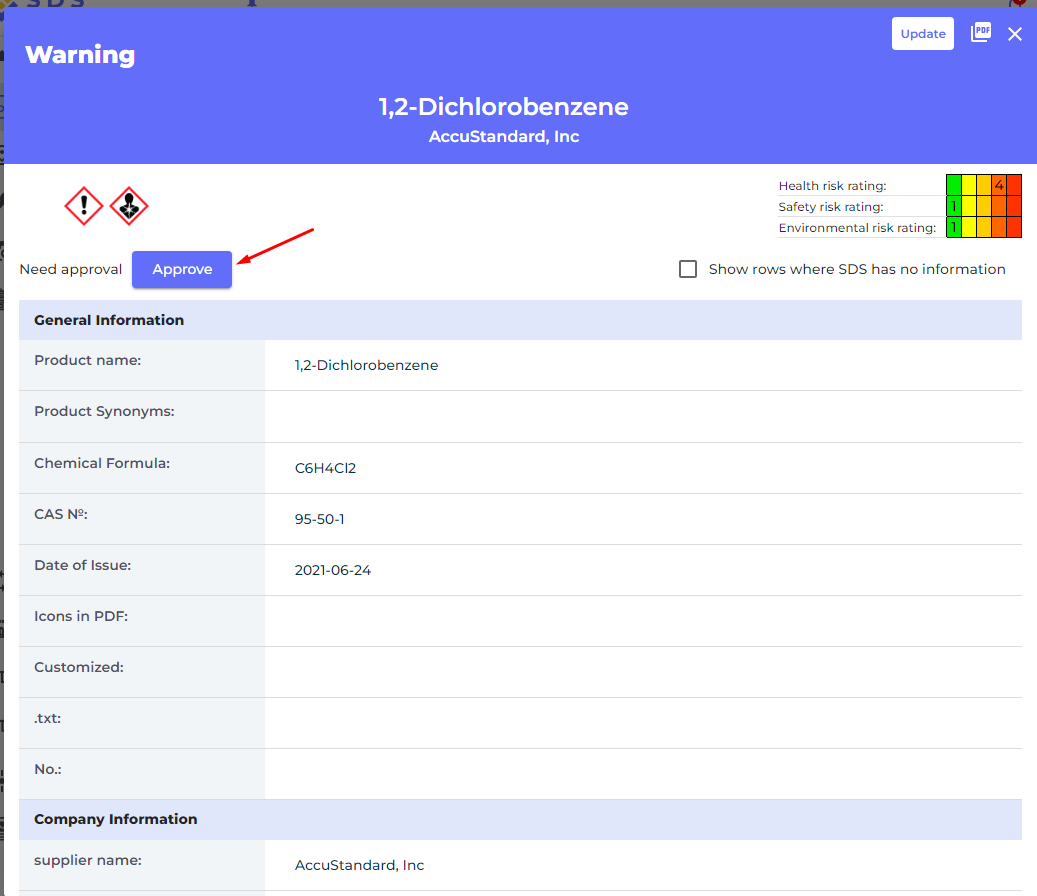
When you have verified that the content is acceptable, you may want to mark the SDS as 'Approved'
Step 8: Create Secondary container labels for very hazardous chemicals
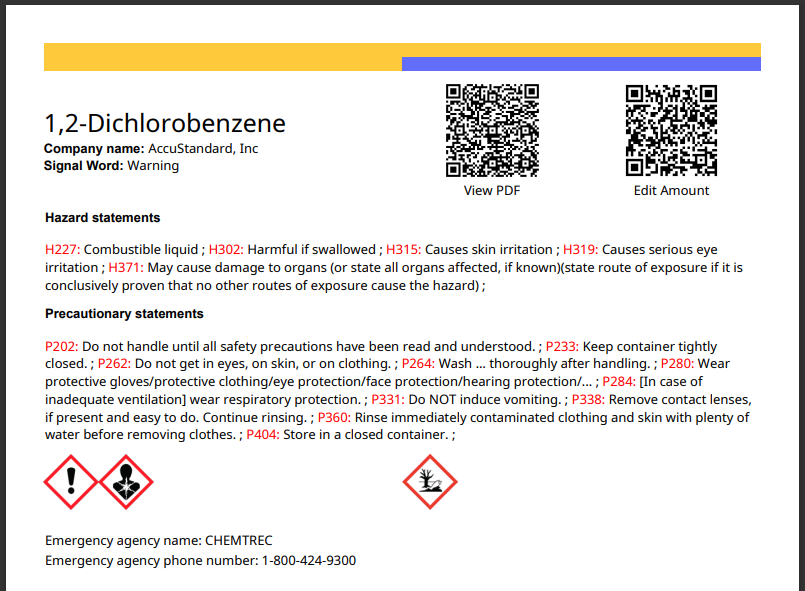
On the label icon, you can generate Secondary Container labels.
Click here to open SDS Manager to create Secondary container labels (require login)

The label has respective QR codes to view the actual SDS file and track chemical usage and disposal.
Icons from the SDS, Hazard statements and Prevention statements are also shown in the label.
Step 9: Print out SDS binders if you prefer to have hard copies on the locations (Optional)
For each location in your SDS library, you can find a 'Print binder' button, which will generate a PDF file that contains all the SDSs stored on that location. On the first page of the SDS Binder, there will be a table of content of all the SDS in the binder.
Click here to open SDS Manager to generate SDS binders (require login)
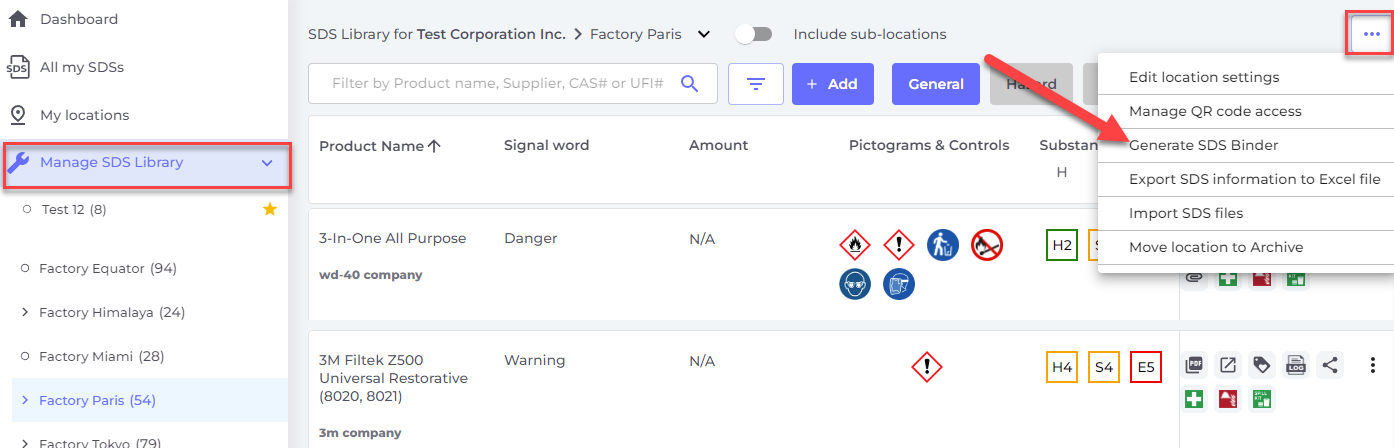
The PDF file can be printed out if you need hard copies.
Step 10: Do Risk assessment of all your chemicals (Optional)
Risk assessment of chemicals and substances can be done either via Job procedures, or directly on the substance for cases where the risk related to the substance isn’t related to an actual Job procedure, or for the case where your company does not wish to document the Job procedures in SDS Manager.
For this case, you can do a risk assessment of the substance itself. The risk assessment of a substance (SDS) is nearly identical to risk assessment of substances in a Job procedure and contains the following:
- The form of the substance
- What the substance is used for
- How the substance should be used
- How the substance should be disposed of
- Duration of exposure to the substance when handled
- Amount of the substance when handled
- Hazard types relevant for handling the substance
- classification of risk, classification of exposure and effect of PPE and controls for each hazard type
- Storage risk regarding safety events
- Storage risk regarding environmental release events
For all locations you have the substance stored, you can evaluate the storage risk.

Step 11: Create risk-assessed Job procedures (Optional)
In SDS Manager, you can assess your Job procedure according to REACH, OSHA and COSHH.
In our Job-procedure risk assessment, you will be able to record the following:
- Frequency of the Job procedure
- The user that will perform the Job procedure
- The locations where the Job procedures will be performed
- Description of the procedure
- Description of the job steps
- Description of the hazards
- Add substances (SDS) that are used in the Job procedure.
For each substance in the Job procedure, you may register the following:
- Form of the substance
- What the substance is used for
- How the substance should be used
- How the substance should be disposed of
- Duration of exposure to the substance in the Job procedure
- Amount of the substance used in the Job procedure
- Hazard types relevant for the Job procedure
- Classification of risk, classification of exposure and effect of PPE and controls for each hazard type
- Storage risk regarding safety events
- Storage risk regarding environmental release events.
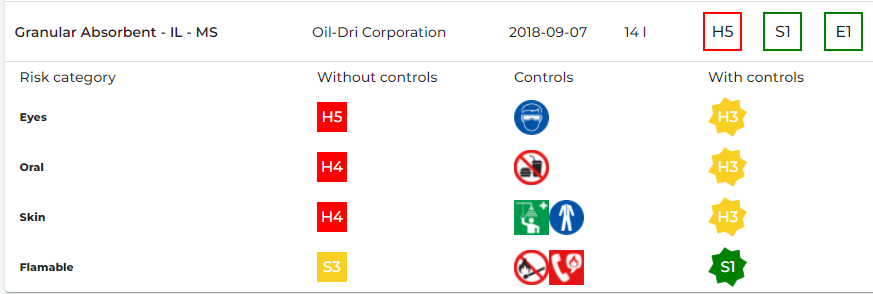
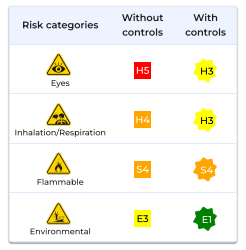
On the Job procedure risk assessment, the risks will be listed for use without PPE and Controls and the risk with Controls.
SDS Manager use a risk classification range from 1-5 for (H)ealth, (S)afety and (E)nvironment.
In below example, we can see that all Health risks are medium high (H3) while the safety risk is very low (S1).
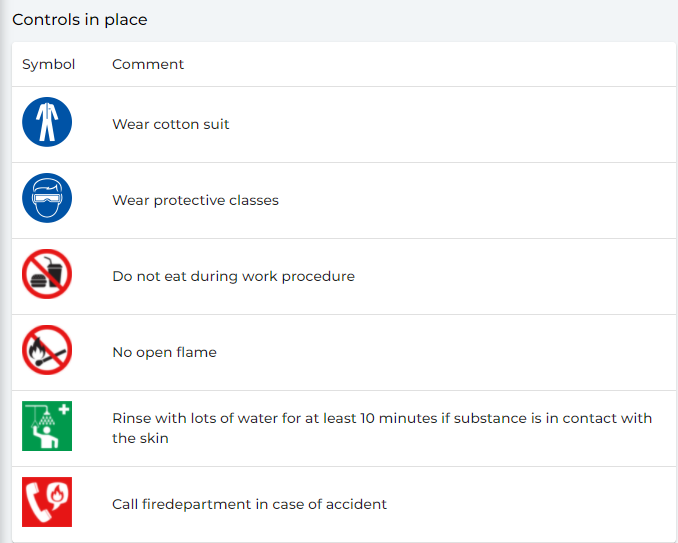
The controls identified on the Job procedure are displayed on any secondary container labels available for any users of the SDS Manager.
Job procedures can be approved and revised.