Getting started: Multiple locations, without SDSs to import
In this article, we will show you how to get started on using SDS Manager to manage your library of Safety Data Sheets (SDSs). We will cover the following areas:
Step 1: Create location structure
Step 2: Add SDSs or Chemicals to your locations by searching our database of 13Million+ Safety Data Sheets.
Step 3: Create QR code poster to allow your employees to access the SDS library using QR code
Step 4: Look through SDSs that contains restricted chemicals and substitute where necessary (Optional)
Step 5: Create Secondary container labels for hazardous chemicals (Optional)
Step 6: Print out SDS binders if you prefer to have hard copies on the locations (Optional)
Step 7: Keep your SDS library up to date with new revisions
Step 1: Create location structure
For organizations with large number of SDSs, it can be helpful to organize the SDSs by locations/departments.
With a location structure, you can delegate administrator access for a subset of locations to other team members. It also allows you to let your employees only have access to SDSs relevant for the site in which they are working.
You can create a location structure with unlimited number of levels.
With SDS Manager, you can link your SDSs to locations.
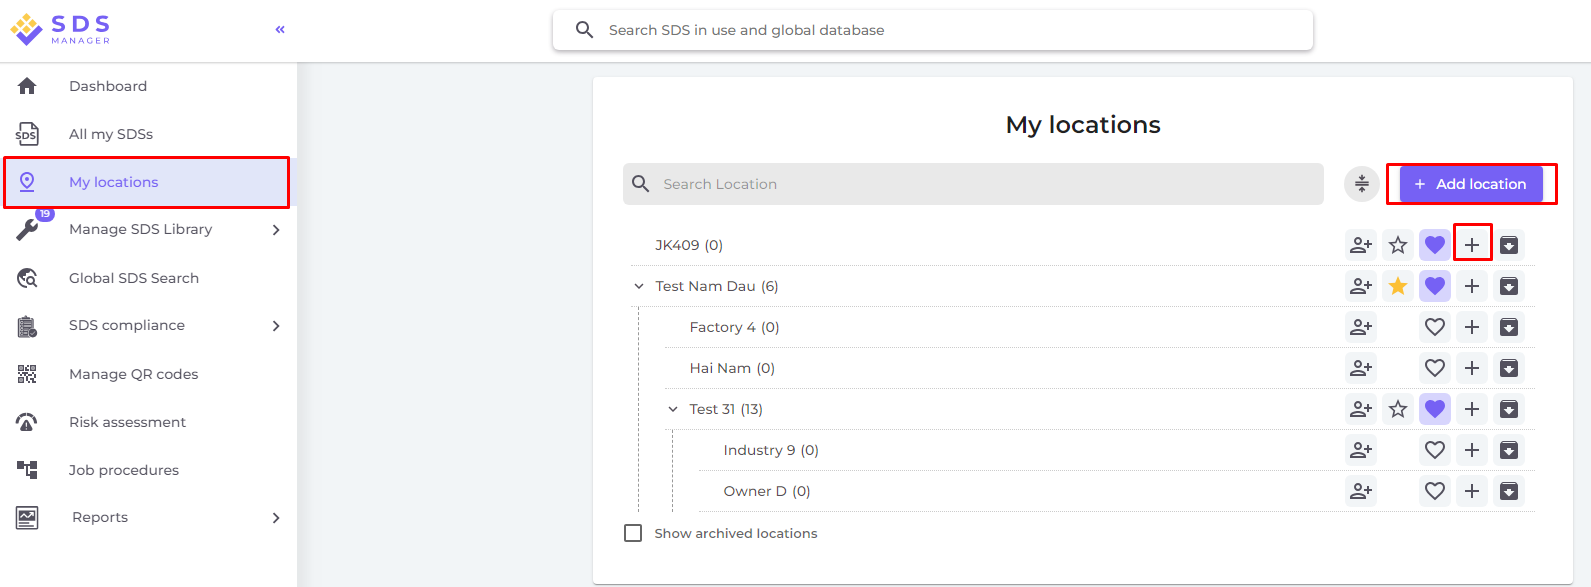
Below is an example of a location hierarchy. The number in the parentheses is the number of SDSs linked to each location.
You can manage your location structure under the menu "My locations". Use the button "Add location" to create new locations and the "+" button to create child-locations.
Click here to open SDS Manager to manage your locations (require login)
Step 2: Add SDSs or Chemicals to your locations by searching our database of 13Million+ Safety Data Sheets.
You can manage your SDSs under "Manage SDS Library"
Click here to open SDS Manager to manage your SDS library (require login)
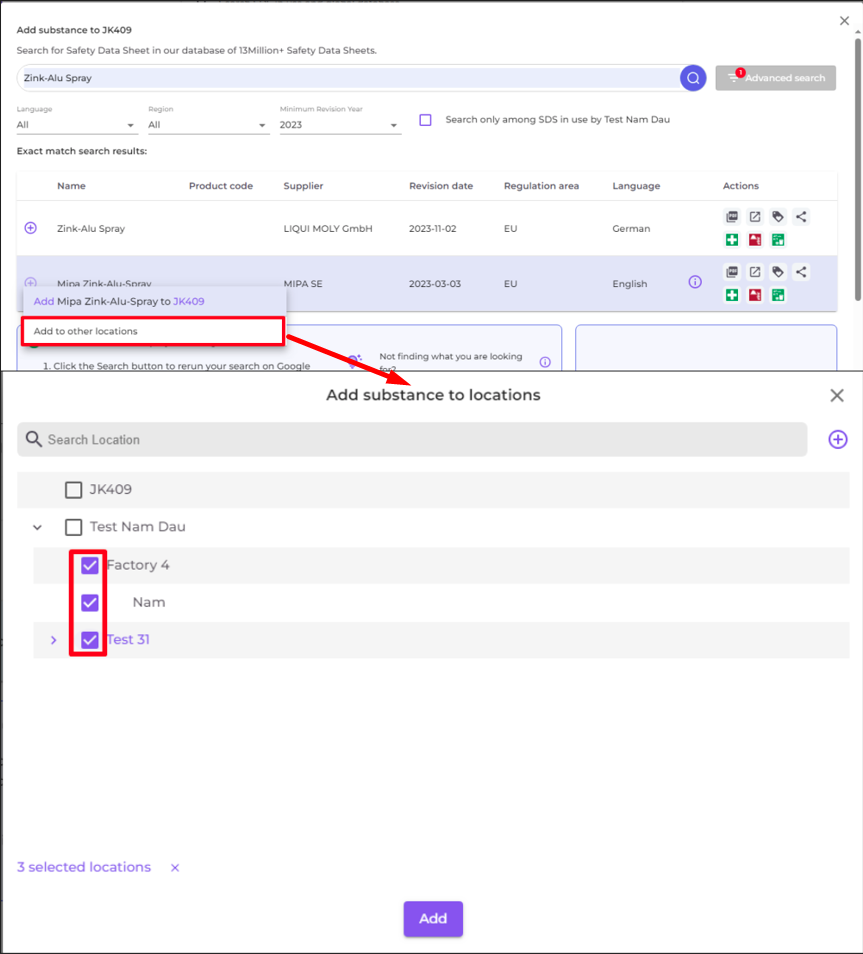
To add a SDS for a product, simply search for the product name, then hover on the (+) icon and choose "Add Safety Data Sheet to YOUR LOCATION".
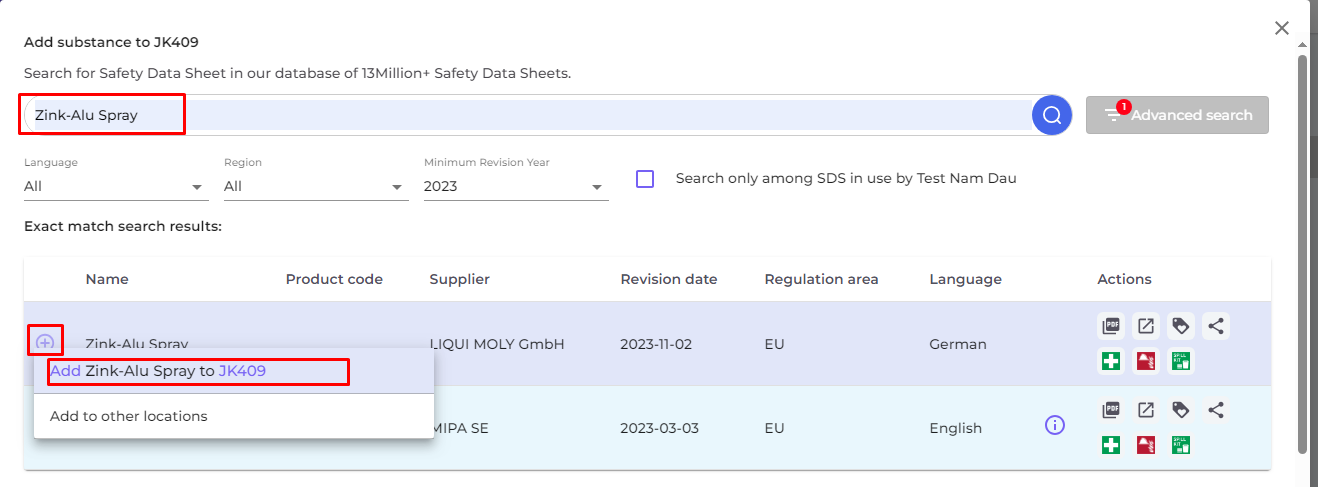
If you want to add the same SDS to multiple locations in one operation, select "Add Safety Data Sheet to other locations" instead.
Step 3: Create QR code poster to allow your employees to access the SDS library using QR code
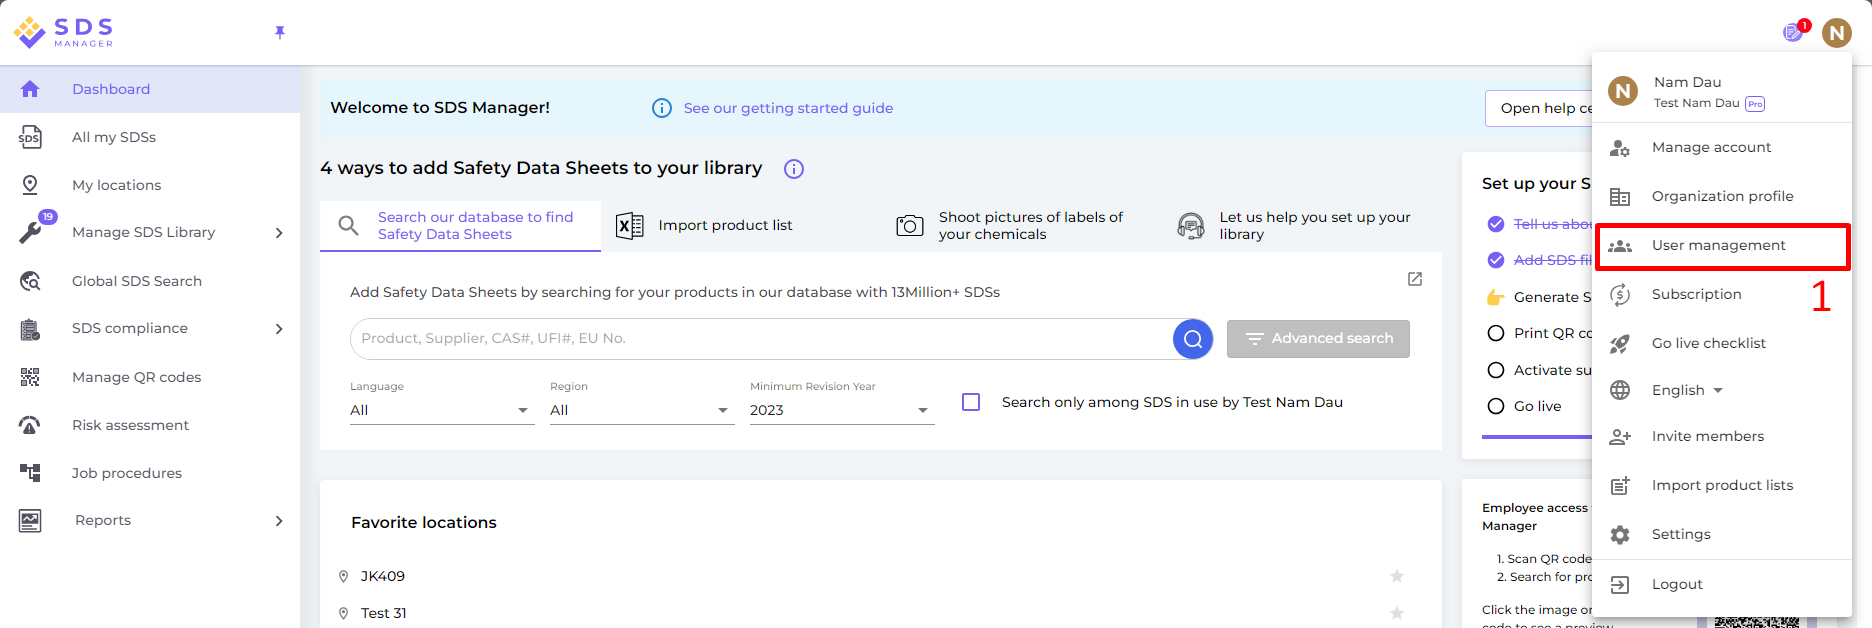
(1) Click here to open SDS Manager User management page (require login)

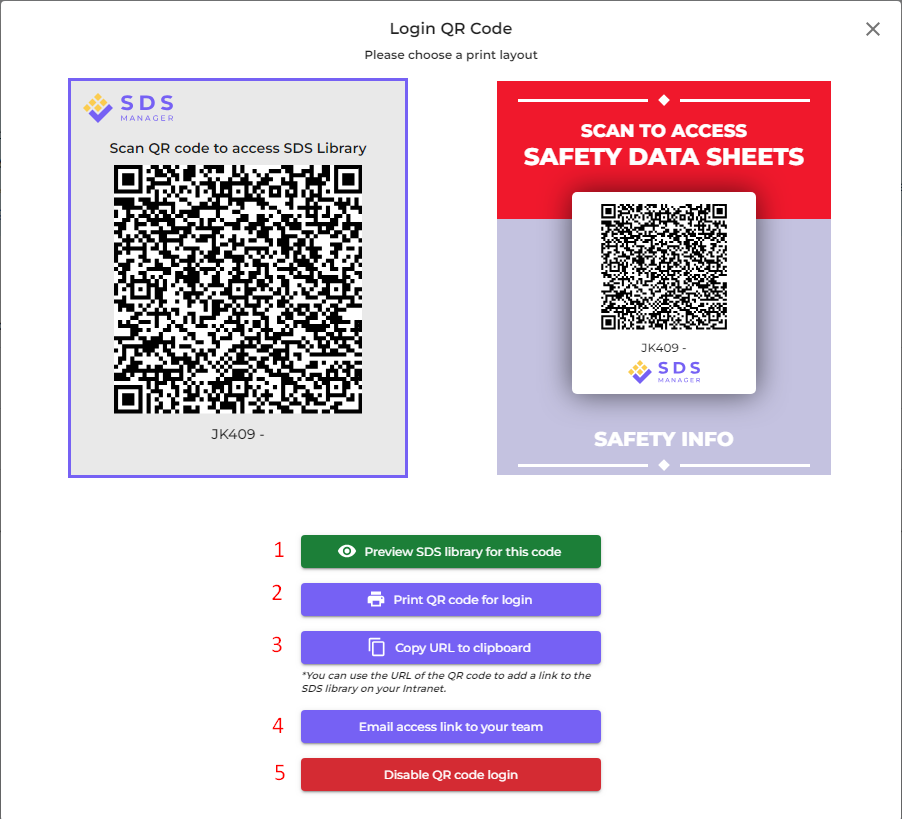
When the QR code user is created, you can view the QR code by (1) clicking on the QR code image.

The button (1) "Preview SDS library for this code" will show you how many SDS this location had
The button (2) "Print QR code for login" will generate a poster with the QR code.
If you want to give access to your SDS library from your intranet, you can simply (3) create a QR code user, scan the QR code and copy the link and add it to your intranet.
The button (4) "Email access link to your team" allow you to share access via email.
You can disable the QR code by clicking the button (5) "Disable QR code login". Choosing that button again to enable it.
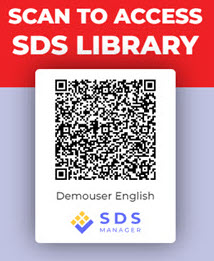
You can or click on the image or scan the below QR code with your mobile phone to see how this will look for your employees.
If you want the link to give access to all SDS in your organization, the QR code user must be granted access to all locations.
You can create many “QR code users” – e.g., one for each of your locations, or a “QR code user” that gives access to all the SDSs your organization has in the SDS library.
Step 4: Look through SDSs that contains restricted chemicals and substitute where necessary (Optional)
SDS Manager has an overview of all chemicals listed on restriction lists like ZDHC, California Proposition 65, REACH and more.
The substances in these lists are identified with either EC or CAS number.
SDS Manager will extract the CAS and EC numbers from section 3 of the SDS you use and check if these numbers are found in any of the restriction list.
In SDS Manager, you will be able to list all the SDSs you have in your SDS Library that have restricted components.
Click here to open SDS Manager see what SDS in your library that are containing hazardous chemicals (require login)
Below is an example of how we list products with components on restricted list:
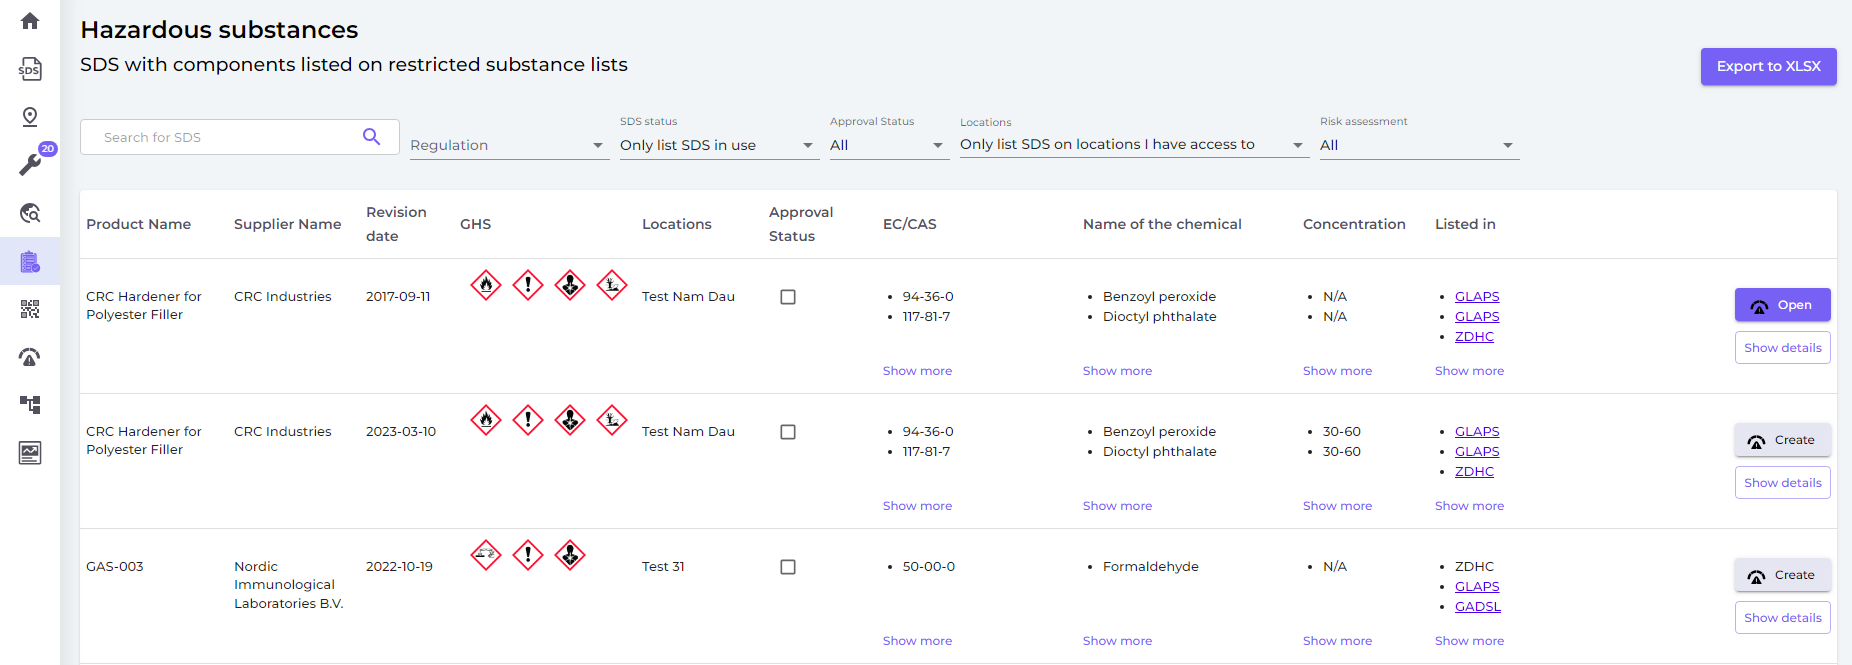
The above list is a prospective list of products that you need to assess.
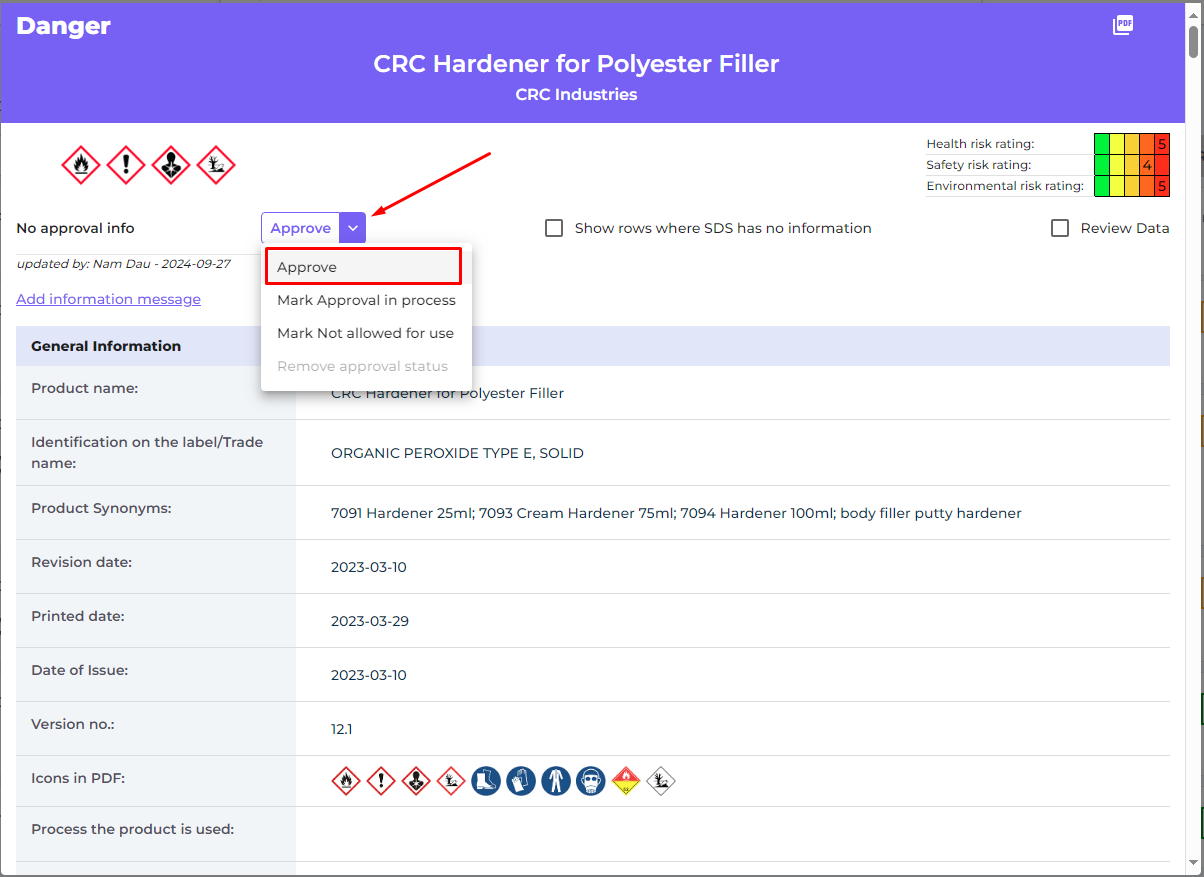
When you have verified that the content is acceptable, you may want to mark the SDS as 'Approve'
Step 5: Create Secondary container labels for hazardous chemicals (Optional)
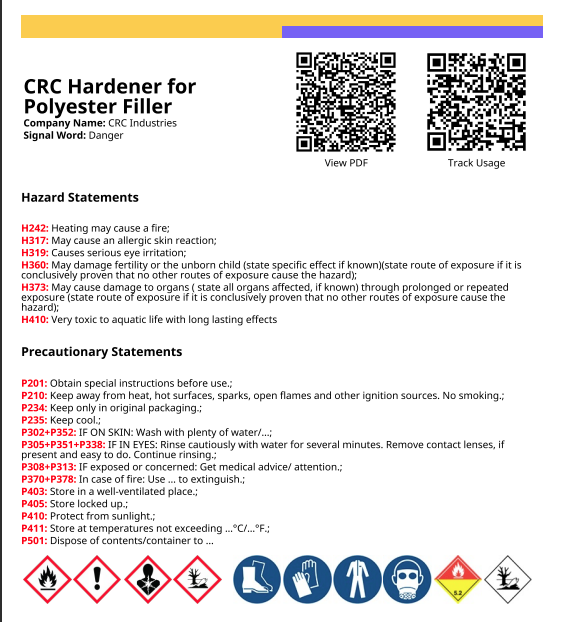
On the label icon, you can generate Secondary Container labels.
Click here to open SDS Manager to create Secondary container labels (require login)

The label has respective QR codes to view the actual SDS file and track chemical usage and disposal.
Icons from the SDS, Hazard statements and Prevention statements are also shown in the label.
Step 6: Print out SDS binders if you prefer to have hard copies on the locations (Optional)
For each location in your SDS library, you can find a 'Print binder' button, which will generate a PDF file that contains all the SDSs stored on that location. On the first page of the SDS Binder, there will be a table of content of all the SDS in the binder.
Click here to open SDS Manager to generate SDS binders (require login)

The PDF file can be printed out if you need hard copies.
Step 7: Keep your SDS library up to date with new revisions
New revisions of SDSs are issued every 1 to 3 years.
New revisions are issued because of new regulatory requirements, corrections or new discoveries by the suppliers. Users of chemicals are required to have the latest version of the SDS in their library.
SDS Manager are continuously crawling thousands of supplier websites for new revisions of safety data sheets and add them to our database.
When you use SDS manager, you will be alerted when we find new versions of SDSs in your library. In the header bar of SDS Manager, you will see the alert icon showing the number of outdated SDSs you have in your library. In the example below, we have 7 outdated SDSs that need to be updated.
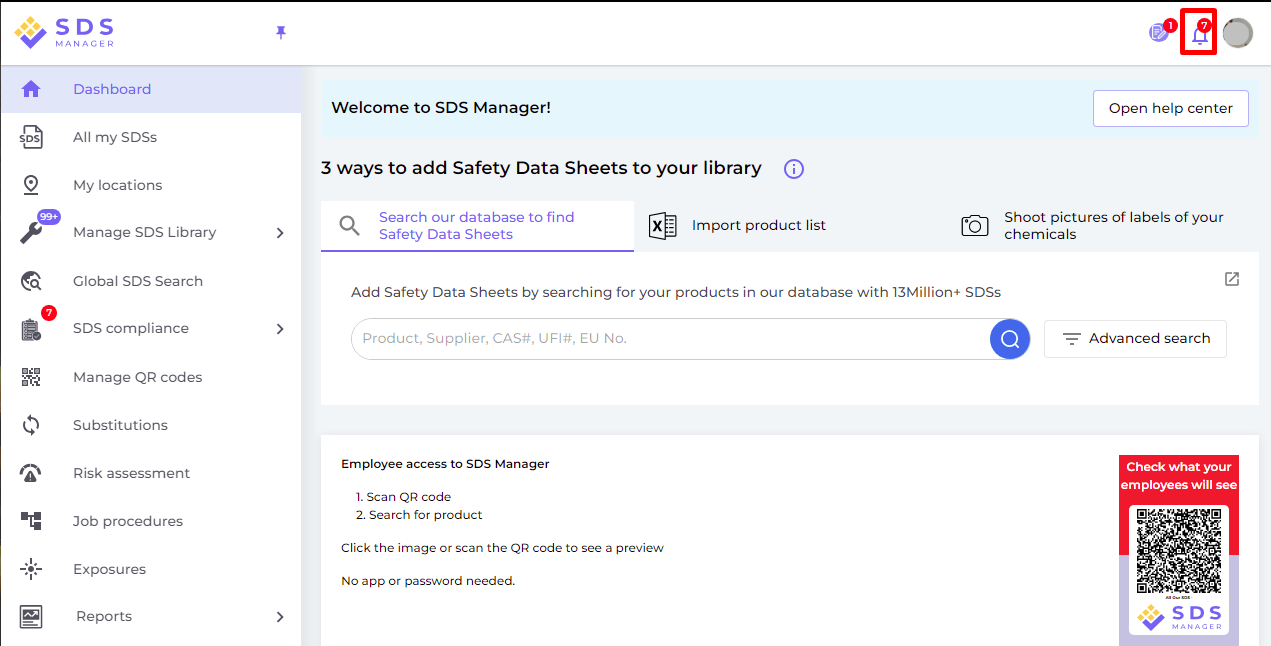
When you click on the notification bell, you will be directed to "SDS where newer version exists" page where we will list SDSs you have in your library for which we found newer versions.
Click here to open SDS Manager to review SDS where newer version exists (require login)

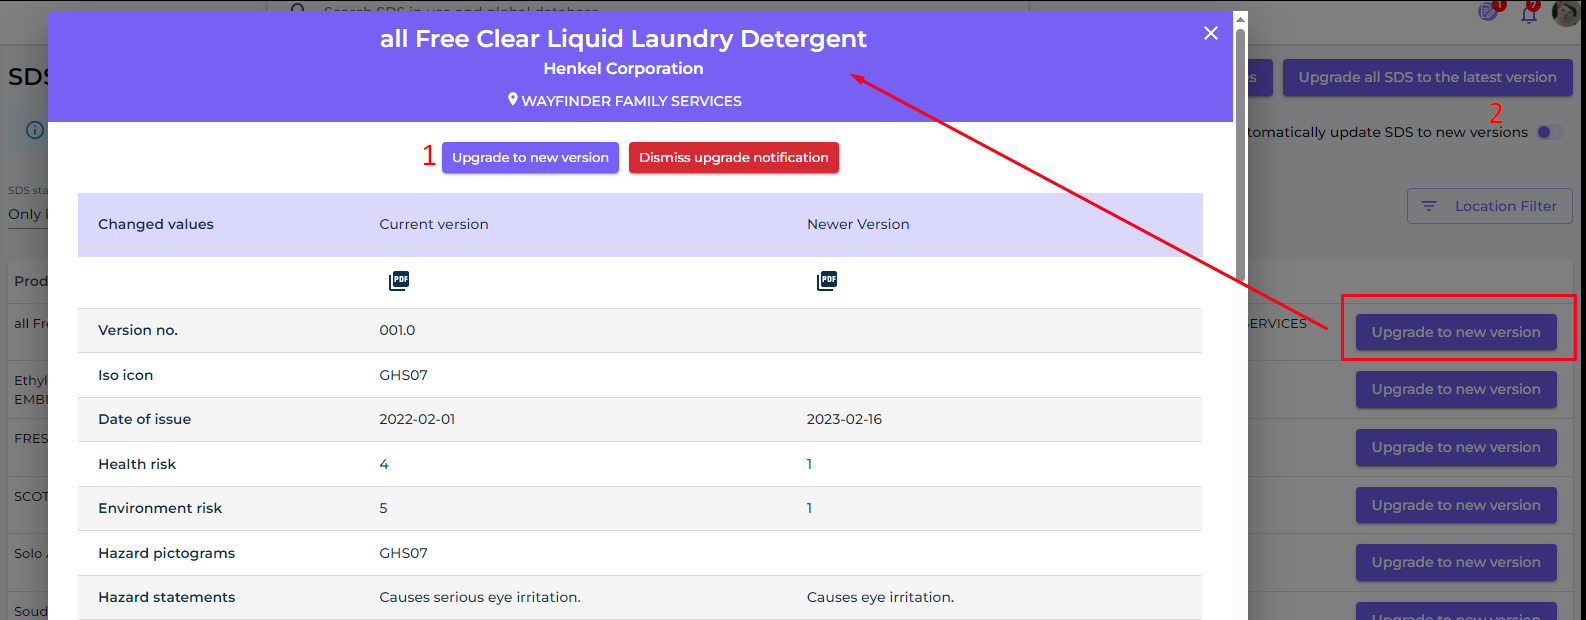
Click on the "Upgrade to new version" button to see side-by-side changes between the SDS you are currently using and the new version.
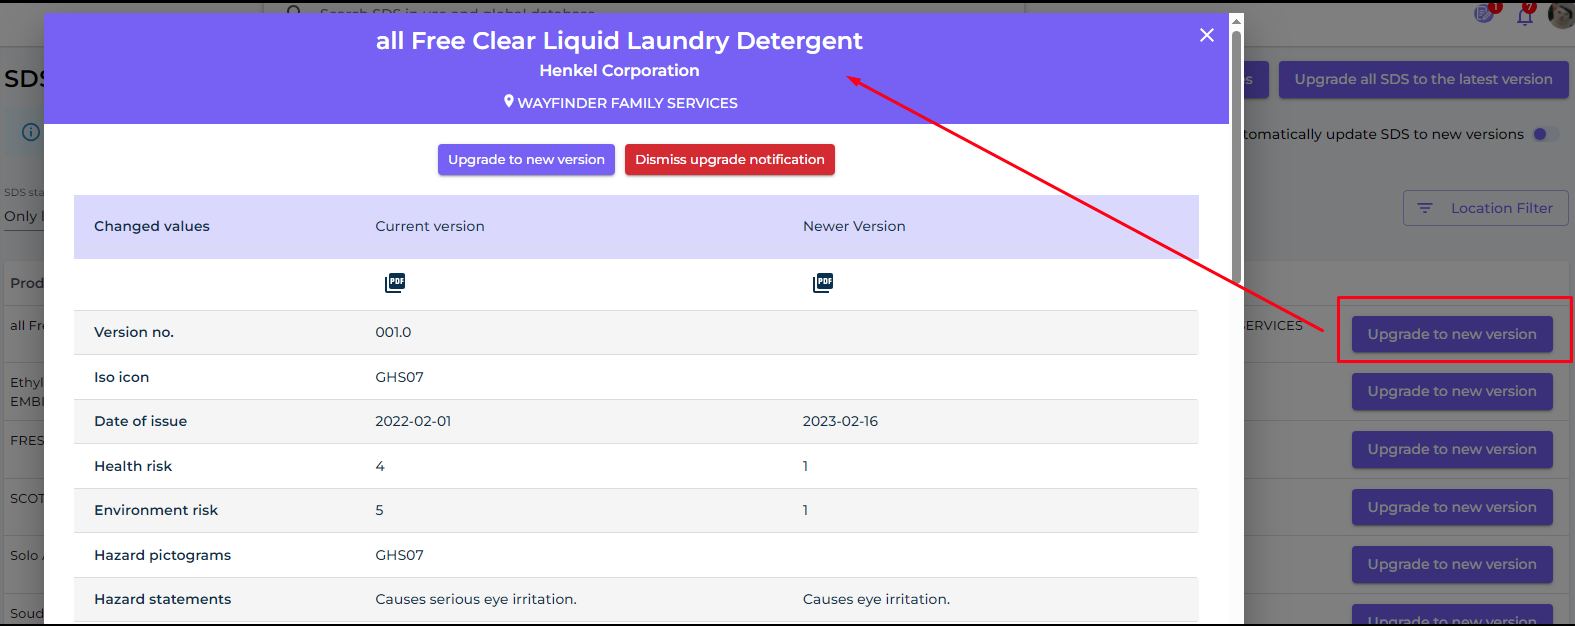
You can choose to upgrade one SDS at a time (1) or upgrade all SDSs to the latest version in one operation (2).
