User manual for "Manage SDS Library" - see how you maintain your SDS library
On the Manage SDS Library page (login required), you can efficiently perform maintenance and management of your SDS library.
This article will cover the following topics:
- Add SDS to the location
- Manage an SDS - actions that can be performed on an SDS in your library
- Settings and management of a location
- Navigate between locations and sub-locations
1. Add SDS to the location
Simply click the "Add Safety Data Sheet" button to add SDS to the current location.
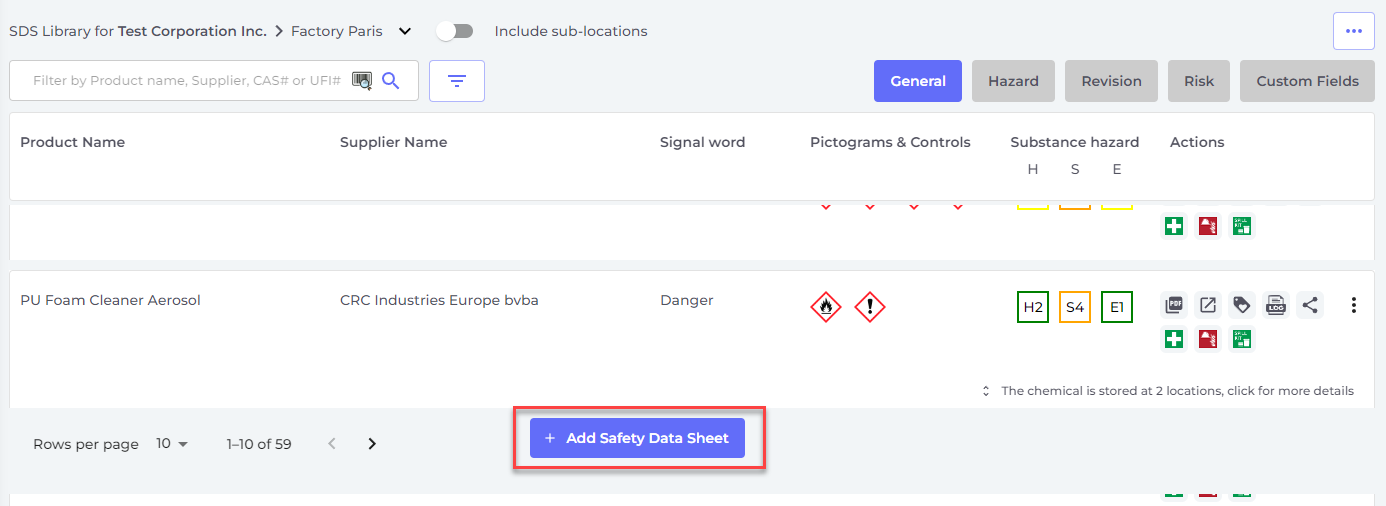
The list of SDS can be sorted by clicking on column headers. E.g. click (H)ealth header to list the SDS order by Health rating. (The rating is given based on the H-codes, P-codes, Pictogram and Signal word)
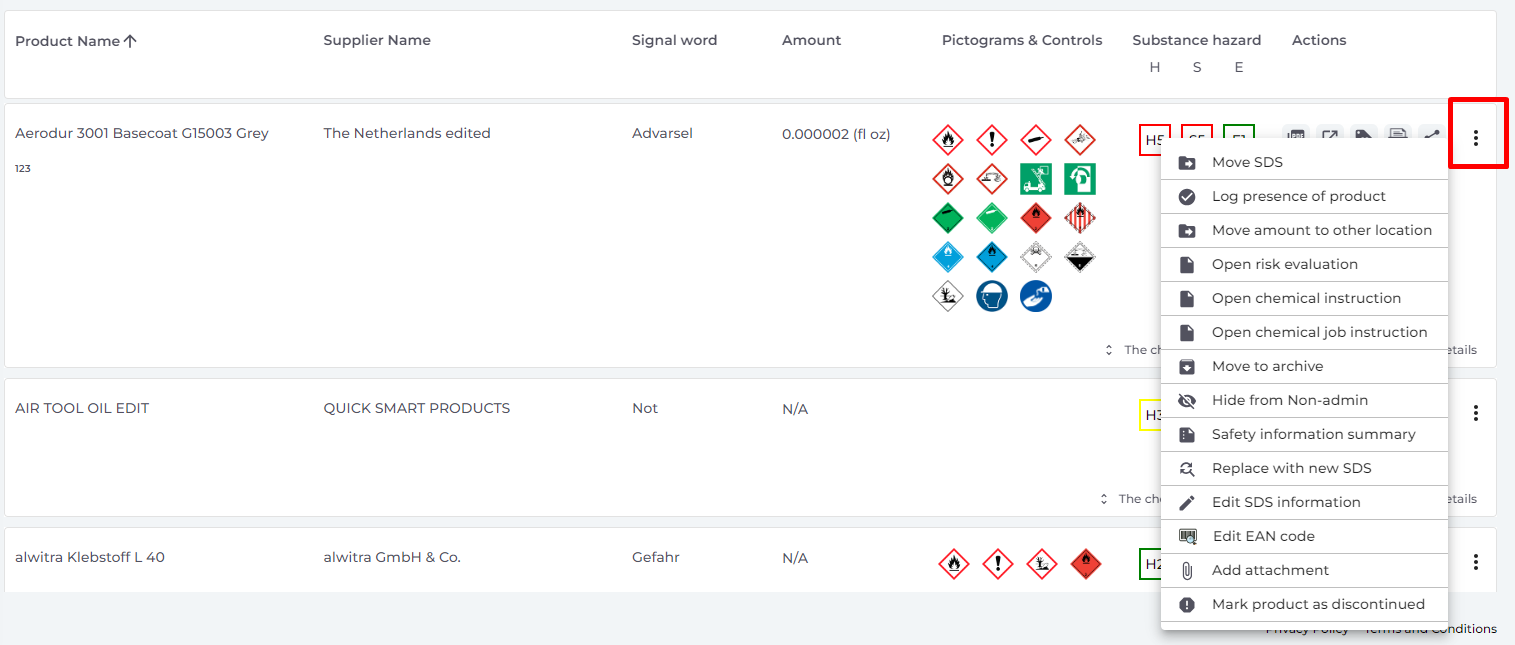
2. Manage an SDS - actions that can be performed on an SDS in your library
The following options are available from the more-menu of each SDS:
- Move SDS (Use this to move the SDS to another location)
- Log presence of product - (Used when you want to reconcile your inventory of SDSs)
- Move amount to other location (When you are using SDS Manager to track chemical usage, you can move some amount of the chemical to another location)
- Create risk evaluation (Shows as Open risk evaluation if evaluation is already existing)
- Open Chemical Instruction - available when a risk evaluation exists for the SDS
- Open Chemical Job Instruction - available when a job procedure exists for the SDS
- Move to archive (In the Archive folder you can un-archive the SDS or permanently delete it from your account)
- Hide from Non-admin (Used for hiding sensitive information - read more here)
- Safety information summary (Generates a summary PDF of the SDS with information from section 4,5,6,7 and 8)
- Replace with new SDS (Used when you want to replace the current SDS with a new SDS file. The new file is automatically imported to the system and will be added to the current location. The old SDS will be moved to the Archive folder and will hold a link for reference to the SDS that replaced it.
- Edit SDS information (Used to edit any information of the SDS, including product name, icons etc. sometimes the product name found on the SDS is not the same as the product name you use in your systems. In such cases you can add the name you use in the Synonym field of the SDS, and user will then find the SDS when searching as the search also include the names found in the synonym field.
- Add EAN/UPC code (With this feature you can scan the bar code of your product and add the code to the SDS. Your employees can then find an SDS by scanning the bar code of the product or entering the EAN/UPC number in the search field.
- Add attachment (Use this option to import any files you want to link to the SDS, e.g. Product sheet, work instructions etc.)
- Print Label (accessed from icon
 - will generate a secondary container label)
 - Mark product as discontinued (Report to us if the SDS is no longer published)
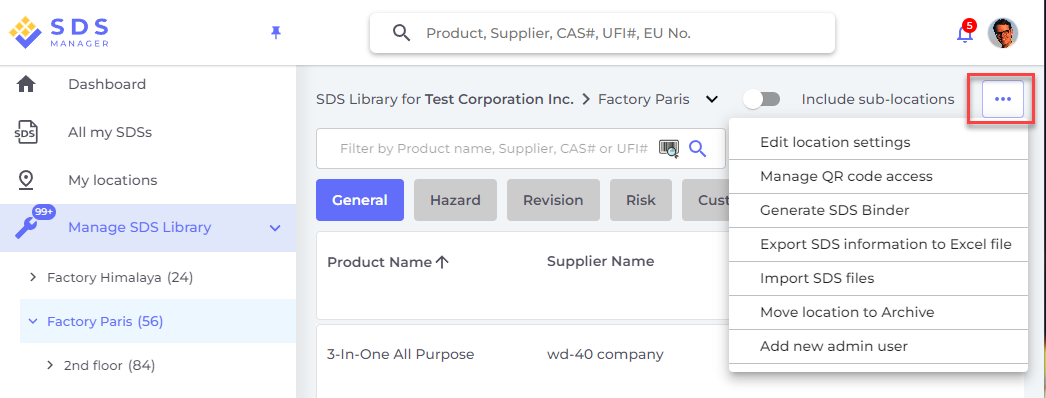
3. Settings and management of a location
On the Manage SDS Library page (require login) you will only see SDSs that belong to the selected locations and its sub-locations if you select "Include sub-locations).
If you need to list and manage all SDS across all your locations, you should use the All Our SDS page (require login). On that page you can perform bulk operations like move, copy, archive on multiple SDSs at the same time.
In upper right corner you find the more-menu with the following options:
- Edit location settings (change locations name and change parent location of current location)
- Manage QR code access (allow you to create a QR code to access SDS on only this location)
- Generate SDS Binder - (SDS binder is a single PDF that contain all SDSs on the locations and its sub-locations and can be used for archive purposes or for off-line access to your SDS library)
- Export SDS information to Excel file (read more here)
- Move location to Archive (you can unarchive archived locations from left menu)
- Add new admin user (use this option to delegate administration of this location.
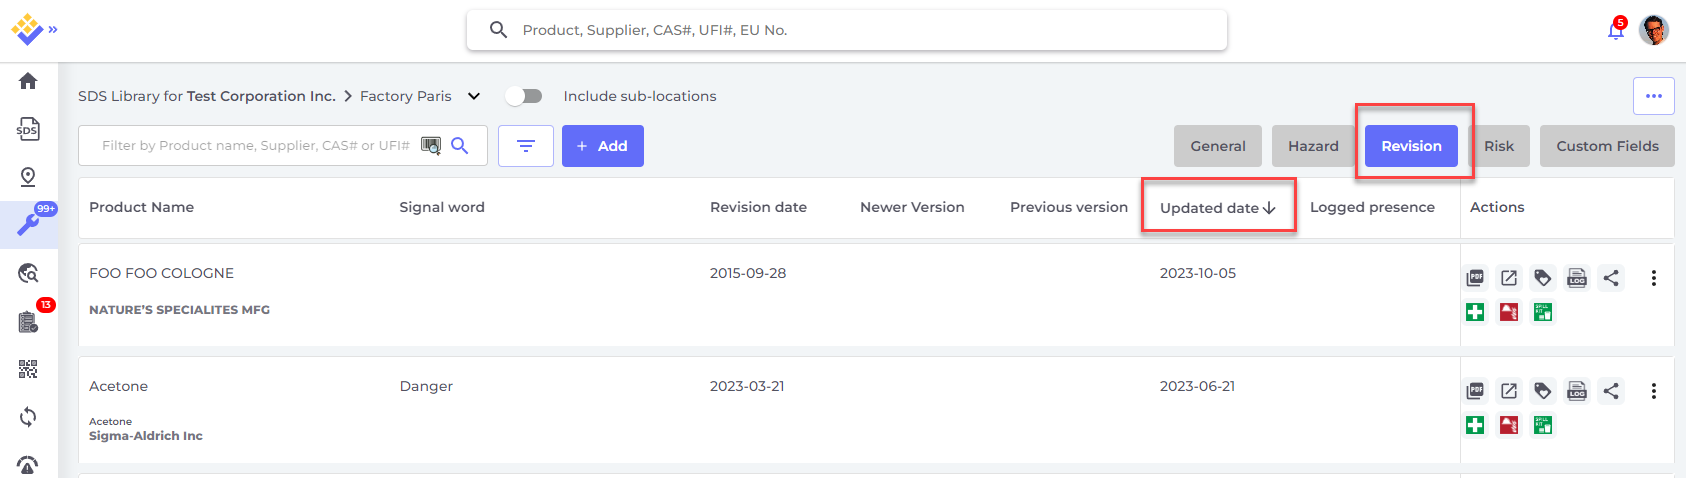
On the Revision tab you can e.g. see when SDSs was added to your library.
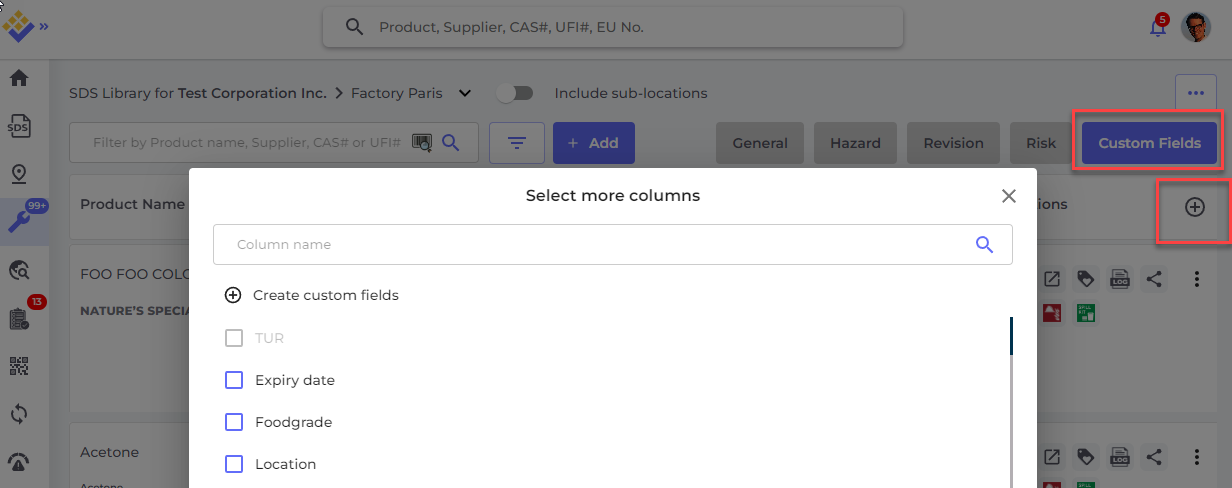
On the Custom Fields tab you can add your own fields associated with your SDSs and select what data is showed in the list view.
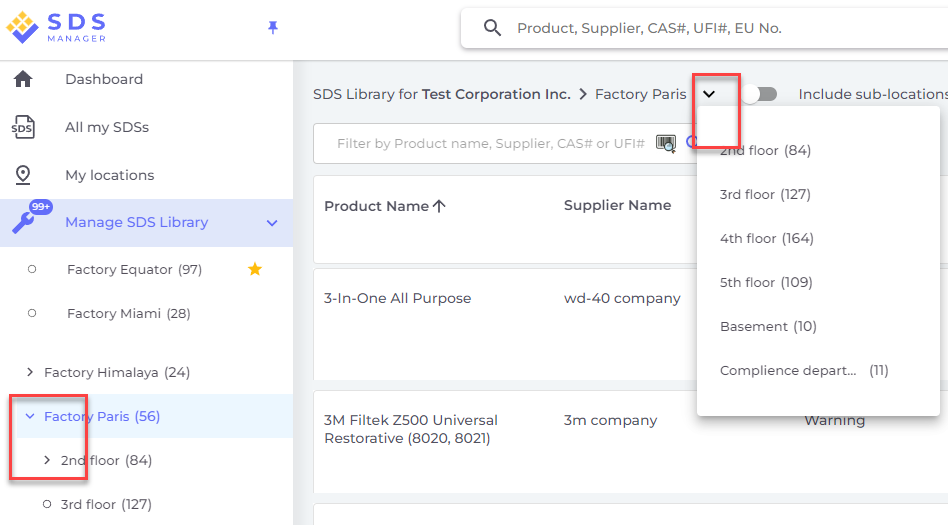
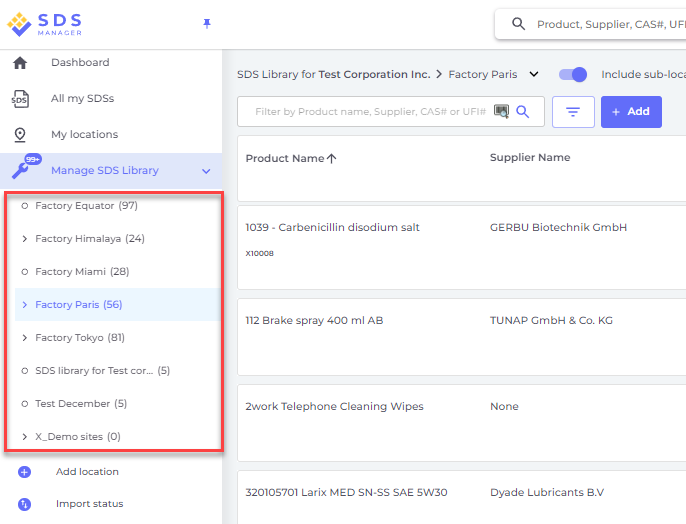
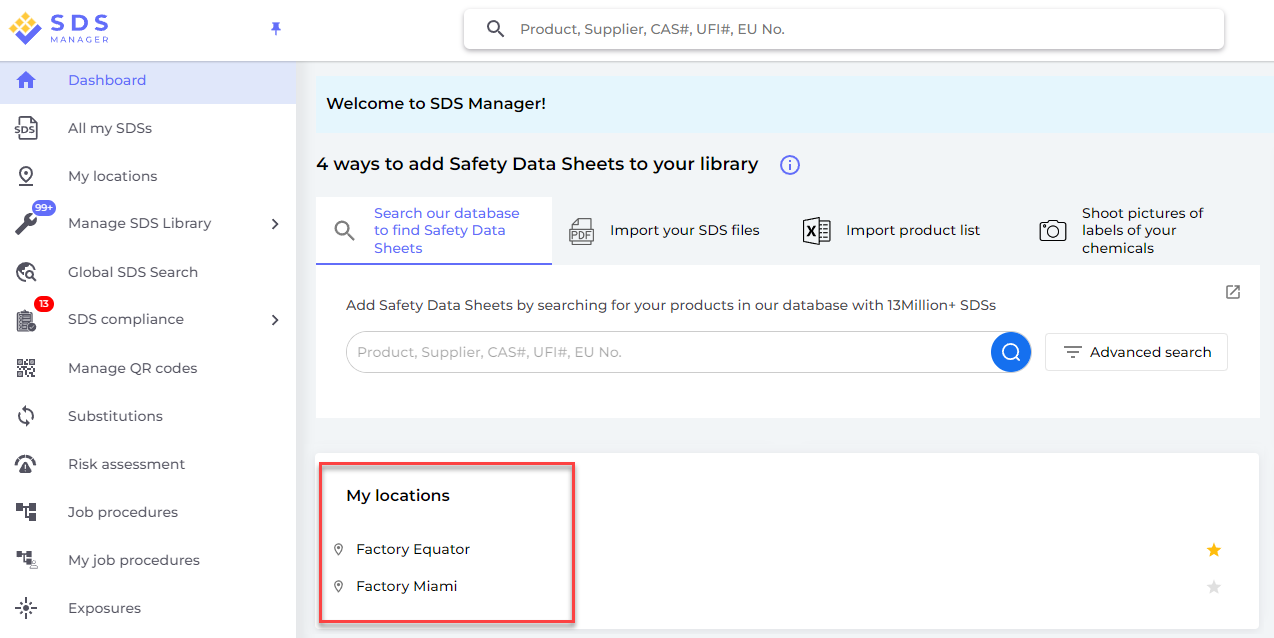
4. Navigate between locations
if you have multiple locations, you move between locations on the main menu. The number in parentheses, is the number of SDS on the location.
In the left-hand menu, select "Add location" to introduce new locations at the root level. For establishing a sub-location, simply press the "+" symbol adjacent to the desired parent location. To include a location in your favorites list, click the favorite icon once, which will turn the icon blue. For setting a location as your default, click the icon a second time, changing it to yellow.
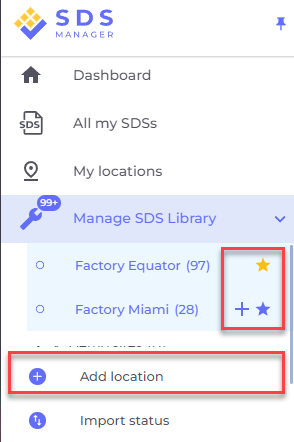
Your favorite locations will show on the dashboard of SDS Manager.
When setting up sub-locations within a primary location, you have the convenience of navigating to these sub-locations either through the main menu or by using the breadcrumb navigation menu at the top of the location page.